Table of Contents >> Show >> Hide
- Why Pasta Machines Need Special Cleaning
- What You Need to Clean a Pasta Machine
- Simple Ways to Clean a Pasta Machine: 11 Steps
- Step 1: Unplug, detach, and let the machine rest
- Step 2: Brush off loose flour from the outside
- Step 3: Let stuck dough dry completely
- Step 4: Run scrap dough through the rollers
- Step 5: Brush the rollers while turning the crank
- Step 6: Clean the cutter attachment carefully
- Step 7: Remove combs or scrapers only if your manual allows it
- Step 8: Clean electric pasta maker parts separately
- Step 9: Wipe the work area and sanitize surrounding surfaces
- Step 10: Dry every part before reassembling
- Step 11: Store the pasta machine in a dry place
- How Often Should You Clean a Pasta Machine?
- Common Mistakes to Avoid
- Manual Pasta Machine vs. Electric Pasta Maker Cleaning
- Best Cleaning Routine for Busy Home Cooks
- Extra Experience: What Real Pasta Nights Teach You About Cleaning
- Conclusion
Fresh pasta is one of life’s great kitchen flexes. You roll out silky sheets, cut ribbons of fettuccine, dust the counter like an Italian nonna in a cooking show, and thenplot twistyou discover tiny bits of dough hiding inside your pasta machine like they signed a long-term lease. Cleaning a pasta machine is not difficult, but it is different from cleaning a pan, bowl, or colander. In most cases, the secret is not more water. It is patience, a dry brush, a soft cloth, and the courage to let sticky dough become dry crumbs before you chase it out.
This guide explains how to clean a pasta machine in 11 simple steps, whether you use a classic hand-crank pasta roller, a stand mixer pasta attachment, or an electric pasta maker with removable discs. The goal is simple: remove flour and dried dough, protect the rollers from rust, keep cutters moving smoothly, and store the machine so it is ready for your next ravioli adventure. No drama, no dishwasher disasters, no mysterious crunchy souvenirs in next week’s lasagna sheets.
Why Pasta Machines Need Special Cleaning
A pasta machine looks sturdy, but it has narrow rollers, cutters, combs, scrapers, gears, and little spaces where wet dough can cling. If you attack those areas with running water, you may push moisture into places that are difficult to dry. That can cause rust, sticky movement, squeaking, or dull cutting performance over time. For many manual pasta machines, dry cleaning is the safest method.
Electric pasta makers are a little different. Many have removable mixing bowls, augers, lids, and shaping discs that can be washed according to the manufacturer’s directions. However, the main motor base should usually stay dry or be wiped carefully with a dry or slightly damp cloth. Before cleaning any pasta maker, check the manual. If the manual says “do not immerse,” believe it. Your pasta machine is not asking for a spa day.
What You Need to Clean a Pasta Machine
Gather your cleaning tools before you begin. You do not need a professional workshop, just a few gentle items that can reach floury corners without scratching metal or forcing water into the mechanism.
- Soft, dry cloth or microfiber towel
- Dry pastry brush, soft toothbrush, or small detailing brush
- Wooden skewer, toothpick, or wooden cleaning stick
- Scrap pasta dough or a small piece of clean polymer clay for pickup cleaning
- Paper towels
- Manufacturer’s cleaning tool, if your machine includes one
- Food-safe disinfectant only for removable parts when approved by the manual
- Warm, soapy water only for washable removable parts
Simple Ways to Clean a Pasta Machine: 11 Steps
Step 1: Unplug, detach, and let the machine rest
If your pasta machine is electric or attached to a stand mixer, unplug the power source before cleaning. Remove the hand crank, clamp, cutter attachment, pasta roller attachment, shaping discs, or removable bowl if your model allows it. For manual machines, separate only the pieces your manual says are removable. Forcing parts apart can turn a five-minute cleaning job into a “why is there a spring on the floor?” situation.
Let the pasta machine sit for about an hour after use if dough is still soft and sticky. Dried pasta dough is much easier to remove than wet dough. Wet dough smears; dry dough flakes. That one-hour wait is not laziness. It is strategy.
Step 2: Brush off loose flour from the outside
Start with the easy win: remove flour from the exterior. Use a soft, dry cloth to wipe the frame, sides, knobs, handle area, and table clamp. Then use a dry brush to sweep around seams, corners, and the base of the rollers. Keep the machine over a trash can, baking sheet, or towel so flour does not redecorate your kitchen.
Avoid soaking the exterior of a manual metal pasta machine. If there are fingerprints or a tiny bit of surface residue, use the driest possible cloth first. If your manual allows a barely damp cloth on the outside, wipe gently and immediately follow with a dry towel.
Step 3: Let stuck dough dry completely
The number one pasta machine cleaning mistake is trying to scrub wet dough from the rollers. Fresh dough is elastic and stubborn. It stretches, smears, and wedges deeper into tiny spaces. Instead, let it dry. Once it becomes brittle, it will break into crumbs and come away with a brush or a gentle tap.
If you used an egg pasta dough, cleaning matters even more because dried residue can attract pests and create off odors if left behind. Give the machine enough time to air-dry in an open area before brushing. Do not place it near water, steam, or a sink full of dishes. Moisture is the villain in this pasta opera.
Step 4: Run scrap dough through the rollers
A smart old-school trick is to pass a small piece of clean scrap dough through the rollers. Use plain dough that is not sticky. Run it through the widest setting several times. It can pick up flour dust, tiny pasta bits, and residue from the roller surface. Throw this cleaning dough away afterward. It is not dinner; it is the kitchen equivalent of a lint roller.
If your machine is new or has been sitting in storage, this step is especially helpful. Many manuals recommend running a piece of dough through the rollers before the first real batch to remove dust or manufacturing residue. Discard the dough, wipe the machine, and then start your edible pasta.
Step 5: Brush the rollers while turning the crank
Use one hand to slowly turn the crank and the other to brush the rollers. Work gently. A soft toothbrush, pastry brush, or small cleaning brush can remove flour and flakes without scratching the surface. Brush from different angles because pasta machines are excellent at hiding crumbs in places only a flashlight and determination can find.
Never insert a dish towel, paper towel, or loose cloth between moving rollers. The cloth can snag and pull into the machine. Also avoid metal knives, forks, or sharp scrapers. They can damage rollers, combs, and cutters. A wooden skewer or toothpick is safer for nudging small dried pieces loose.
Step 6: Clean the cutter attachment carefully
Cutter attachments usually collect more dried dough than flat rollers because they have narrow channels and teeth. Remove the cutter attachment if your machine allows it. Turn it upside down and shake it gently over a towel. You may hear crumbs fall out, which is oddly satisfying and slightly embarrassing.
Brush the cutters from both sides while slowly turning the mechanism. If dried pasta is stuck in the teeth, use a wooden skewer or the included cleaning pick to loosen it. Do not jab aggressively. You are cleaning a pasta tool, not mining for gold. Gentle pressure protects the cutting edges and keeps the attachment aligned.
Step 7: Remove combs or scrapers only if your manual allows it
Some high-quality manual pasta machines have removable combs or scrapers under the rollers. These parts help keep dough from wrapping around the rollers during use. If your manual shows how to remove them, follow those instructions exactly. Take a quick photo before disassembly so you remember how everything fits back together.
Once removed, wipe or brush the combs and scrapers clean. Some manufacturers allow these small removable pieces to be rinsed with cold water or cleaned with a food-safe surface disinfectant. If you do rinse them, dry them completely before reinserting. Completely means completelynot “mostly dry but good enough.” Hidden moisture can lead to rust or rough movement.
Step 8: Clean electric pasta maker parts separately
Electric pasta makers are convenient because many removable parts are washable. Depending on the model, the lid, mixing chamber, auger, shaping discs, or pasta cutter may be cleaned under running water or placed in the dishwasher on a safe temperature setting. Always check the instructions for your exact model because “electric pasta maker” is a broad category, and each brand has its own rules.
Shaping discs are easiest to clean after the dough inside the holes has dried. Let them air-dry first, then poke out the dried dough with the supplied cleaning tool. Trying to clean fresh dough from tiny disc holes is like trying to remove gum from a sweater with optimism. Let time do the hard work.
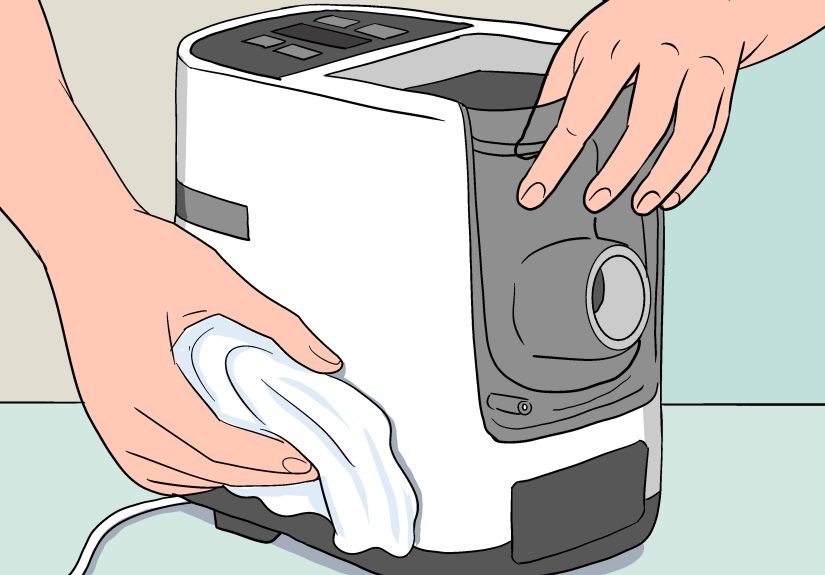
For the motor base, control panel, and cord area, use a dry cloth or a slightly damp cloth only if the manual permits it. Never immerse the main unit in water. Do not spray cleaner directly into buttons, vents, or seams.
Step 9: Wipe the work area and sanitize surrounding surfaces
Cleaning the machine is only half the job. Pasta making usually involves flour, eggs, dough scraps, and plenty of hand contact. Wash the counter, cutting board, and tools with hot, soapy water after use. If raw egg touched the surface, clean first, then sanitize according to food-safety guidance or the label on a kitchen-safe sanitizer.
Keep the pasta machine itself as dry as your manual requires, but do not ignore the surrounding workspace. A clean counter protects your next batch of pasta and keeps your kitchen from becoming a flour-powered snow globe.
Step 10: Dry every part before reassembling
Drying is not optional. Any removable part that was rinsed, wiped with a damp cloth, or cleaned with a food-safe solution must be fully dry before reassembly. Place parts on a clean towel with airflow around them. Turn shaping discs and combs over so water does not hide in small grooves.
For manual rollers and cutters, finish with a dry microfiber cloth. Leave the machine out for a little while before putting it away. If you see moisture, wait. Pasta machines reward patience with smooth rolling and fewer maintenance headaches.
Step 11: Store the pasta machine in a dry place
Once the machine is clean and dry, store it in a cabinet, pantry, or original box. A dry storage spot helps prevent rust and dust buildup. Keep small attachments together so the clamp, crank, cleaning brush, and cutter pieces do not migrate into the mysterious drawer where measuring spoons go to retire.
If your machine squeaks or feels stiff, check the manual before adding anything. Some models allow a tiny amount of food-safe mineral oil or food-contact lubricant at specific roller ends or moving points. Do not use cooking oil. It can become sticky, attract dust, and smell unpleasant over time.
How Often Should You Clean a Pasta Machine?
Clean your pasta machine after every use. You do not need a deep disassembly every time, but you should remove flour, dried dough, and visible residue before storing it. A basic cleaning routineair-dry, brush, wipe, inspect, storetakes only a few minutes once you get used to it.
Deep cleaning is useful when dough gets stuck in cutters, when the machine has been stored for a long time, or when you notice rough rolling, uneven cutting, or crumbs falling out during use. For frequent pasta makers, a more careful inspection every few batches keeps the machine performing well.
Common Mistakes to Avoid
Do not wash a manual pasta machine under running water
Many manual pasta machines are not designed for sink washing. Water can enter the rollers and internal mechanism, where it is difficult to remove. That moisture can cause rust or sticky movement. Unless your manual specifically says a part is washable, keep it dry.
Do not put manual rollers in the dishwasher
Dishwashers use heat, water pressure, detergent, and long moisture exposure. That combination is bad news for many manual pasta rollers and cutters. Even stainless-looking machines may contain internal parts that do not appreciate dishwasher treatment.
Do not scrape with metal tools
A knife may seem helpful when dough is wedged inside the cutter, but sharp metal tools can scratch rollers, bend combs, and damage cutting teeth. Use a wooden skewer, toothpick, or manufacturer’s cleaning pick instead.
Do not store the machine while damp
A damp machine stored in a dark cabinet is a recipe for rust and unpleasant smells. Dry first, store second. That order is non-negotiable.
Manual Pasta Machine vs. Electric Pasta Maker Cleaning
A manual pasta machine is usually a dry-clean tool. You brush, wipe, remove crumbs, and avoid water. The rollers and cutters rely on narrow mechanical parts that should stay dry. The main cleaning focus is removing dried dough and flour without scratching or soaking the machine.
An electric pasta maker often has more washable parts, but the motor base still needs protection. Removable bowls, lids, augers, and shaping discs may be washable depending on the model. The control panel, base, cord, and motor housing should stay dry. Think of it this way: removable plastic parts may enjoy the sink; the motor base absolutely does not.
Best Cleaning Routine for Busy Home Cooks
If you want the fastest reliable routine, follow this pattern. After cutting pasta, leave the machine out while you cook dinner. Once the dough bits dry, brush the rollers and cutters. Wipe the exterior with a dry cloth. Tap the cutter attachment gently to release crumbs. Inspect the underside and corners. Store everything only when fully dry.
This routine works because it respects how pasta dough behaves. Wet dough clings. Dry dough crumbles. A pasta machine is much easier to clean when you stop fighting the dough and let it lose moisture first.
Extra Experience: What Real Pasta Nights Teach You About Cleaning
After many home pasta sessions, one lesson becomes clear: the easiest pasta machine to clean is the one you did not overload with sticky dough in the first place. Cleaning starts before cleaning. If the dough is too wet, it will smear across the rollers, grab onto the cutters, and leave gummy bits in places your brush can barely reach. A properly kneaded pasta dough should feel firm, smooth, and only slightly tacky. If it feels like it wants to become glue, dust it lightly with flour and let it rest before rolling.
Another useful habit is to roll smaller pieces of dough. Oversized dough sheets make a mess because they wrinkle, fold, and push soft edges into the sides of the roller. Smaller sheets move more cleanly, cut more evenly, and leave less residue. It may feel slower at first, but it saves cleanup time later. Pasta machines are like toddlers with crayons: give them too much at once and you will be cleaning corners for a while.
Flour control also matters. Too little flour and the dough sticks. Too much flour and the machine becomes dusty inside. The sweet spot is a light dusting on both sides of the dough sheet, especially before running it through cutters. Brush extra flour off the machine after each batch rather than waiting until the end. Tiny maintenance moments during pasta making prevent a big cleaning project afterward.
If you make filled pasta such as ravioli, clean more carefully. Filling can leak from the dough sheet and introduce cheese, moisture, herbs, or egg into the machine. That is not the kind of “extra flavor” anyone wants in the rollers. If a sheet tears and filling touches the machine, stop and clean the area as soon as safely possible, following your manual. Do not keep rolling and hope the problem becomes artistic.
A dry toothbrush is one of the most underrated pasta tools in the kitchen. Keep one labeled for cleaning only. It reaches around cutter teeth, roller edges, attachment seams, and clamp grooves. Pair it with a wooden skewer, and you can remove nearly every dried crumb without water. A small flashlight also helps because flour and dough hide in shadows under the cutter.
For electric pasta makers, the best experience-based advice is to clean in stages. Remove big dough pieces first, let discs dry, poke out the holes, then wash approved removable parts. If you try to rinse everything immediately, wet dough can become paste and clog shaping holes. Letting dough dry feels counterintuitive, but it works beautifully.
Finally, make cleaning part of the pasta ritual. Put the water on to boil, hang or nest your noodles, and let the machine air-dry while you cook. After dinner, spend a few calm minutes brushing and wiping. Future you will be thrilled when the machine comes out of the cabinet clean, dry, and ready to roll. Nothing ruins a fresh pasta mood faster than discovering last month’s dough confetti inside the cutter.
Conclusion
Cleaning a pasta machine is simple once you understand the golden rule: dry first, brush second, store only when completely clean and dry. Most manual pasta rollers should not be washed under running water or placed in the dishwasher. Instead, use a soft cloth, dry brush, wooden skewer, and a little patience. Electric pasta makers may have washable removable parts, but the motor base should stay protected from water.
With these 11 steps, your pasta machine can stay smooth, sanitary, and ready for many batches of lasagna sheets, spaghetti, fettuccine, ravioli, and whatever noodle masterpiece you decide to conquer next. Clean it well, store it dry, and it will reward you with better pasta and fewer crunchy surprises.
![18 Best Types of Charts and Graphs for Data Visualization [+ How to Choose]](https://corkopencoffee.org/wp-content/uploads/2026/05/18-best-types-of-charts-and-graphs-for-data-visualization-how-to-choose-qKM1PBYG-thumb.jpg)


