Table of Contents >> Show >> Hide
- Why Turn a TV Cabinet into a Kitchen Cabinet?
- Planning Your #30DayFlip Kitchen Cabinet Makeover
- Step-by-Step: Turning a TV Cabinet into a Kitchen Cabinet
- How to Use Your New Kitchen Cabinet (Beyond Just “More Storage”)
- Budget, Timeline, and Common Mistakes
- Is a TV Cabinet Turned Kitchen Cabinet Worth the Effort?
- Real-Life Experiences and Lessons from a TV Cabinet Kitchen Flip
- Conclusion
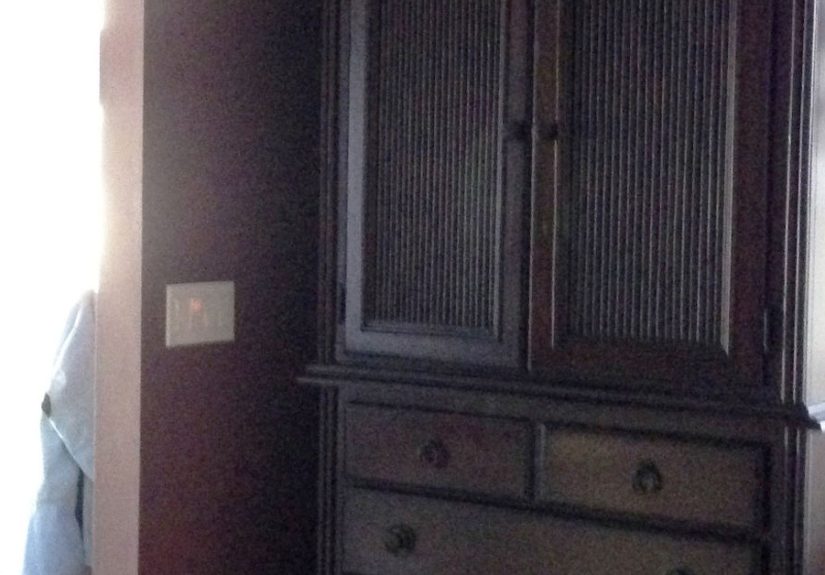
Remember those giant TV cabinets from the pre–flat-screen days? The ones big enough to hide
a small child, three VCRs, and a lifetime supply of tangled cables? Today, those hulking
entertainment centers are showing up in thrift stores and Facebook Marketplace for next to
nothing which makes them perfect candidates for a brilliant DIY glow-up.
In true #30DayFlip fashion, turning a dated TV cabinet into a hardworking
kitchen cabinet is the kind of project that looks dramatic on Instagram but is totally doable
in real life. With a bit of planning, some basic tools, and a sense of humor about sawdust
in your hair, you can transform a clunky relic into a custom pantry, coffee bar, or
extra storage that looks like it came from a high-end boutique kitchen.
This guide walks you through the process step by step: how to plan, prep, paint, and style your
repurposed TV cabinet so it fits your kitchen, your budget, and your lifestyle. We’ll talk
about layout, storage, finishes, and smart shortcuts that DIYers use to make upcycled
furniture look designer without paying designer prices.
Whether you’re working in a tiny condo kitchen or just want extra storage that doesn’t scream
“big box store,” this TV cabinet turned kitchen cabinet makeover might be your favorite flip
of the whole #30DayFlip challenge.
Why Turn a TV Cabinet into a Kitchen Cabinet?
1. You Get Serious Storage for Small Money
Old TV cabinets were built for bulky televisions and electronics, which means they tend to be
deep, tall, and surprisingly sturdy. That combination is gold in a kitchen. Instead of paying
for brand-new pantry units, you can often pick up a solid wood TV armoire for the price of a
nice dinner and turn it into vertical storage for food, dishes, or appliances.
Many DIYers report saving hundreds of dollars by upcycling existing furniture instead of
buying new cabinets, especially when they already have a piece languishing in the garage.
You’re basically shopping your own house and then giving it a makeover.
2. It Adds Character to a Basic Kitchen
Stock cabinets are great for function, but they can feel a little predictable. A repurposed TV
cabinet, on the other hand, brings instant personality. Painted in a bold color or wrapped
in a warm wood stain, it can look like a custom furniture piece that happened to land in your
kitchen. It’s the kind of thing guests notice first and ask about immediately.
This is especially helpful in builder-grade spaces. One statement piece can distract from
laminate countertops or plain tile, making the whole room feel more thoughtful and
collected.
3. It’s an Eco-Friendly Upgrade
Every TV cabinet you rescue from the curb or resale shop is one fewer piece of bulky furniture
heading to the landfill. Upcycling is one of the most practical ways to decorate more
sustainably: you reuse a solid piece of furniture, reduce demand for new materials, and end up
with something that’s tailored to your space instead of mass-produced.
Planning Your #30DayFlip Kitchen Cabinet Makeover
Assess the TV Cabinet You Have
Before you break out the paintbrushes, take a good look at the cabinet you’re working with:
- Structure: Is the frame solid? Does it wobble? Are there soft spots in the wood?
- Material: Solid wood is dreamy, but many cabinets are veneer or MDF.
That’s okay they just need proper priming. - Doors and hinges: Do they open smoothly? Will they clear your kitchen walls or appliances?
- Back panel: Most TV cabinets have a giant cutout for the old tube TV.
Decide whether you want to patch it, cover it, or leave part of it open for outlets.
If the bones are bad mold, severe water damage, or structural cracks it might not be the
best candidate. But cosmetic issues like scratches, orange oak stain, or questionable hardware
are exactly what paint and creativity are for.
Measure Your Space (Twice)
The fastest way to turn a fun DIY into a cautionary tale is to drag a giant cabinet into your
kitchen and realize it blocks the fridge. Measure in three directions:
- Height: Make sure it fits under the ceiling with room for crown molding if you want it.
- Width: Leave at least a few inches on either side so doors can swing open.
- Depth: TV cabinets are often deeper than standard kitchen cabinets.
Decide if you like the furniture look or if you need to trim or visually balance the depth.
Also think about traffic flow. Can someone pass by while a door is open? Does it block a window
or vent? Good planning now keeps you from inventing new words later.
Decide on the Cabinet’s New Job
A TV cabinet in the kitchen can play a lot of roles. Pick one main function so your design
choices support it:
- Pantry: Add deep shelves and clear bins for dry goods.
- Coffee bar: Create counter-height space inside for a coffee maker and mugs.
- Appliance garage: House mixers, blenders, and air fryers behind closed doors.
- Dish cabinet: Install sturdy, evenly spaced shelves for plates and glassware.
Knowing the cabinet’s “job description” helps you figure out shelf spacing, power needs,
and which organizers or bins you’ll want inside.
Step-by-Step: Turning a TV Cabinet into a Kitchen Cabinet
Step 1: Empty, Clean, and Gently Demolish
Start by removing every shelf, bracket, random cable clip, and plastic TV mount. Old
electronics components need to go so you can see what you’re working with. Vacuum out dust,
then scrub everything with a degreaser or a mix of warm water and mild cleaner to give your
paint a clean surface to stick to.
Carefully remove any glass doors or panels if you don’t plan to keep them. Label hinges and
screws in small bags so reassembly doesn’t turn into a hardware scavenger hunt.
Step 2: Repair and Reinforce
Once the cabinet is stripped down, you’ll probably notice a few things that need love:
- Fill old screw holes and dings with wood filler.
- Glue and clamp any loose joints in the frame.
- Add small corner braces inside if the cabinet feels wobbly.
- Patch open areas in the back with plywood if you want a fully enclosed cabinet.
This is also the time to think about power. If you plan to keep appliances inside say, for a
coffee bar consider leaving a portion of the back open or drilling a neat grommet hole for
an outlet strip.
Step 3: Add New Shelves and Layout
TV cabinets usually have one or two large openings, which is not ideal when you’re trying
to stack cereal boxes, cookie sheets, and an entire Costco run. Adding shelves makes the piece
behave like a real kitchen cabinet.
- Use 3/4-inch plywood or pre-cut shelving boards for strength.
- Support shelves with side cleats or adjustable shelf pins.
- Vary shelf height: taller sections for cereal boxes or appliances, shorter ones for cans and jars.
For a coffee bar or appliance garage, consider leaving one section open at counter height and
adding a pull-out tray or a simple work surface inside.
Step 4: Sand, Prime, and Paint Like a Pro
A smooth finish is what takes your project from “Oh, that’s clever” to “Wait, where did you
buy that?” Lightly sand all surfaces with medium-grit sandpaper to scuff the existing finish,
then vacuum and wipe with a tack cloth.
Next, apply a quality bonding primer suitable for glossy or previously finished cabinets. This
step is crucial if you’re dealing with veneer or old lacquer primer keeps your paint from
peeling or chipping prematurely. Once primed, apply two to three thin coats of cabinet or
furniture paint, letting each coat dry thoroughly.
Color-wise, you can:
- Match your existing kitchen cabinets for a built-in look.
- Choose a contrasting color navy, forest green, or charcoal for a bold furniture vibe.
- Try a light neutral to brighten a small kitchen while keeping it calm and cohesive.
Step 5: Upgrade the Hardware and Details
Swapping hardware is one of the easiest ways to modernize an old cabinet. Replace dated brass
knobs with simple black pulls, brushed nickel bar handles, or warm brass knobs that match your
kitchen style. If the hinges are visible and seen better days, upgrade those too.
Inside, consider:
- Adding baskets or bins on lower shelves for snacks or produce.
- Mounting hooks or rails on the doors for measuring cups or spices.
- Lining shelves with wipeable shelf liner for easy cleanup.
Step 6: Move It into the Kitchen and Secure It
Once the paint has cured and everything is reassembled, bring the cabinet into its new home.
If it’s tall or top-heavy, anchor it to the wall with furniture straps or L-brackets
especially important if you have kids or pets who think everything is a climbing gym.
Level the cabinet using shims if your floors aren’t perfectly even (spoiler: most aren’t).
Then step back and admire how your once-forgotten TV cabinet suddenly looks like it was made
for your kitchen.
How to Use Your New Kitchen Cabinet (Beyond Just “More Storage”)
As a Freestanding Pantry
A repurposed TV cabinet makes a fantastic pantry in kitchens that lack built-ins. Use clear
containers or labeled bins so nothing gets lost at the back. Store heavy items like canned
goods on lower shelves and lighter items like pasta or snacks up top.
As a Coffee or Beverage Station
Turn your cabinet into a café corner by dedicating a shelf for your coffee maker, mugs,
and supplies. Keep coffee beans, tea bags, and syrups in labeled jars, and add a small
trash bin and scoop inside. When guests arrive, just open the doors and instantly look
like the kind of person who has their life together.
As an Appliance Garage
If your countertops are crowded with gadgets, use the cabinet to tuck them away. Mixers,
blenders, waffle makers, and air fryers can all live inside. Add a power strip, and you can
plug things in without hauling them in and out every time.
As Display Storage
If your cabinet has glass doors, style the inside with your prettiest dishes, cookbooks,
or pantry jars. Stick to a simple color palette so it doesn’t look cluttered. This turns the
whole piece into a decorative focal point instead of purely utilitarian storage.
Budget, Timeline, and Common Mistakes
One of the best parts of a TV-cabinet-turned-kitchen-cabinet project is the price tag.
Depending on what you already have on hand, you might only need to buy:
- Primer and paint
- New hardware (optional but worth it)
- Wood or plywood for extra shelves
- A few brackets, screws, and wall anchors
Many DIYers complete this kind of flip for well under the cost of a single new pantry cabinet,
especially if the TV cabinet was free or thrifted at a discount.
Common mistakes to avoid:
- Skipping primer: This almost guarantees peeling later.
- Not sanding glossy surfaces: Paint needs something to grab onto.
- Overloading weak shelves: If you’re storing heavy items, reinforce them.
- Forgetting to anchor: Safety first, especially with tall furniture.
Is a TV Cabinet Turned Kitchen Cabinet Worth the Effort?
If you’re hoping for a perfectly measured, factory-finished cabinet that snaps into a row of
brand-new kitchen units, this might not be your project. But if you love character, enjoy
a good before-and-after, and want serious storage on a realistic budget, a TV cabinet flip
is a clear win.
You’ll get:
- A unique piece that looks custom.
- Extra storage without a full kitchen remodel.
- The satisfaction of rescuing furniture and making it work harder.
- A fantastic story every time someone compliments your “fancy cabinet.”
And of course, you get those #30DayFlip bragging rights plus a new excuse to post
dramatic before-and-after photos.
Real-Life Experiences and Lessons from a TV Cabinet Kitchen Flip
Every DIYer who has tackled a TV cabinet turned kitchen cabinet project ends up with a
slightly different story, but the themes are surprisingly similar: a little frustration, a
few “What was I thinking?” moments, and a big payoff when the doors finally close on a
beautifully organized interior.
One common experience is underestimating just how much storage you gain. A cabinet that once
held a TV and a couple of movies suddenly becomes a full pantry. People often discover they
can fit baking supplies, canned goods, snacks, and even small appliances all in one place.
That changes how the rest of the kitchen functions countertops clear off, inside cabinets
get less cluttered, and it becomes easier to see what you actually have before grocery runs.
Another shared lesson is that prep work takes longer than expected, but it’s always worth it.
DIYers who rush sanding and priming often find paint chipping or scratching when they slide a
can across a shelf. Those who take time to scuff-sand, prime properly, and let paint cure
report that their finish holds up like a true kitchen cabinet even with daily use, kids
rummaging for snacks, and doors opened a hundred times a day.
Shelf spacing is another “aha” moment. On paper, evenly spaced shelves sound great. In reality,
your pantry staples are all kinds of heights: cereal boxes, tall olive oil bottles, short cans,
and odd-shaped bags. Many people end up moving shelves after they’ve lived with the cabinet
for a few weeks. That’s why adjustable shelves or multiple rows of shelf-pin holes are such a
smart idea. Building flexibility into the design means the cabinet can evolve with your needs.
There’s also the emotional side of the project. For some, the TV cabinet is a sentimental piece
that’s too solid or memory-filled to give away, but too dated to keep as-is. Turning it into a
kitchen cabinet lets you keep the history while giving it a job that fits your current life.
That’s a different kind of satisfaction than just buying something new you’re essentially
writing a second chapter for a piece that’s been with you through moves, family gatherings,
and Netflix marathons.
On the practical front, many DIYers admit they initially worried about the cabinet looking
“too big” or “out of place” in the kitchen. But once it’s painted to coordinate with the space
and styled with simple hardware, the cabinet usually reads as intentional. It often becomes the
anchor of the room, especially in open-plan spaces where a big piece of furniture helps define
the kitchen zone.
Lighting is another experience-based tip: if the inside of the cabinet feels dark, inexpensive
stick-on LED puck lights or strip lights make a huge difference. Suddenly your pantry, coffee
bar, or appliance station feels custom-lit, and you’re not squinting into a deep, shadowy box
looking for the paprika.
Finally, people consistently report that this kind of flip changed how they look at old
furniture forever. After one successful TV cabinet to kitchen cabinet transformation, you
start eyeing every armoire, dresser, and bookcase as potential kitchen storage. That mindset
is at the heart of the #30DayFlip idea: once you see what’s possible with a little creativity
and a few weekends of work, your whole home becomes a canvas for smart, budget-friendly
upgrades.
In the end, the TV cabinet turned kitchen cabinet project isn’t just about storing cereal and
coffee. It’s about proving to yourself that you can create something beautiful and functional
with your own hands, using what you already have. Every time you open those doors and see a
tidy, organized interior where an old television once lived, you get a little reminder:
you flipped that. And that feeling makes every minute of sanding and painting completely worth
it.
Conclusion
Turning a TV cabinet into a kitchen cabinet is exactly the kind of project that captures what
DIY is all about: creativity, problem-solving, and giving old pieces a fresh purpose. With
thoughtful planning, solid prep, and a bit of patience, you can transform a bulky relic into a
hardworking pantry, coffee bar, or appliance station that genuinely improves how your kitchen
works.
Whether you’re joining a #30DayFlip challenge or simply looking for a smart
storage upgrade, this flip delivers big impact for a modest budget. You save money, reduce
waste, and end up with a unique piece that adds character and function to your home. Not bad
for something that used to hold a giant TV and a stack of DVDs.


