Table of Contents >> Show >> Hide
- Why This Glass Vase Makeover Works So Well
- What I Used
- Step 1: I Picked the Right Vase Shapes
- Step 2: I Cleaned the Glass Like It Owed Me Money
- Step 3: I Mixed Paint to Create a Faux Pottery Texture
- Step 4: I Applied the First Coat and Ignored My Inner Critic
- Step 5: I Layered the Finish Instead of Overworking It
- Step 6: I Let Everything Dry Properly
- How I Made the Finish Look More Like Real Pottery
- Common Mistakes I’d Avoid Next Time
- How I Styled the Finished Vases at Home
- Was It Worth It?
- My Real Experience Making Glass Vases Look Like Pottery
- Final Thoughts
- SEO Tags
There are two kinds of home decor people in this world: the ones who casually buy a gorgeous handmade pottery vase and the rest of us, who stare at the price tag like it personally offended our ancestors. I, naturally, belong to group two. So instead of spending a small fortune on artisanal pottery, I grabbed a few plain glass vases and decided to fake the look. And honestly? It worked so well that my shelves suddenly looked less “last-minute supermarket flowers” and more “I definitely have opinions about texture.”
If you’ve been wondering how to make glass vases look like pottery, the answer is delightfully simple: prep the surface well, use the right paint, build texture on purpose, and finish everything with a soft, matte, ceramic-inspired look. The result is a faux pottery vase DIY that feels high-end, handmade, and far more expensive than it has any right to be.
In this guide, I’ll walk you through exactly how I transformed ordinary glass into pottery-style decor, what worked, what almost became a craft-induced emotional event, and how to style the finished pieces so they actually look like elevated home decor instead of a chaotic science fair project.
Why This Glass Vase Makeover Works So Well
The magic of this project comes down to one thing: texture. Real pottery has visual weight. It isn’t slick, shiny, or overly perfect. It often has a chalky finish, soft irregularities, subtle brush movement, and that slightly earthy “I was made by human hands” vibe. Glass, on the other hand, is smooth, reflective, and very committed to being glass.
That’s why the makeover works. Once you tone down the shine, create a matte finish, and add a little thickness to the paint, the eye stops reading the vase as transparent and starts reading it as ceramic. This is especially true in interiors that lean rustic, organic, wabi-sabi, farmhouse, coastal, or modern minimalist. A matte, textured vase instantly feels warmer and more grounded than a glossy clear one.
In other words, this project is less about “painting a vase” and more about changing the material story. Dramatic? Yes. True? Also yes.
What I Used
Basic Supplies
- Plain glass vases from a thrift store, dollar store, or the back of a cabinet you forgot existed
- Water-based acrylic or multi-surface paint
- Baking soda for texture
- A small bowl or disposable cup for mixing
- Paintbrushes, including one wider brush for coverage
- Soap and water for cleaning
- Rubbing alcohol and a lint-free cloth
- Fine-grit sandpaper, optional but helpful
- Adhesion primer, optional for extra durability
- Matte sealer, optional depending on the look and paint used
You do not need a workshop, a kiln, or a mysterious artistic past. You just need patience, decent lighting, and a willingness to trust the process when the first coat looks underwhelming.
Step 1: I Picked the Right Vase Shapes
Before I even opened a paint bottle, I learned something important: shape matters. If you want a painted glass vase to look like pottery, choose a silhouette that already feels sculptural. Rounded bodies, urn-like shapes, narrow necks, chunky cylinders, and slightly imperfect thrifted forms all work beautifully. Super-sleek, ultra-modern glass can still be transformed, but the pottery illusion gets stronger when the shape already hints at ceramic design.
I went for a mix of a short round vase, one taller bottle-shaped piece, and one medium-sized cylinder. That gave me variety for styling later, and it made the whole group look collected instead of bought in one panic-filled afternoon.
Step 2: I Cleaned the Glass Like It Owed Me Money
This is the unglamorous step, but it matters more than people want to admit. Paint does not love dust, oils, fingerprints, sticker residue, or whatever weird invisible film seems to appear on glass the second you look away.
I washed each vase in warm, soapy water, dried it completely, and then wiped it down with rubbing alcohol. That second wipe is the hero move. It removes lingering residue and gives the paint a better chance to grip. If a vase felt especially slick, I lightly scuffed the outside with fine-grit sandpaper. Not enough to scratch it into oblivionjust enough to help with adhesion.
If you want the finish to last longer, especially on very glossy glass, a light coat of primer can help. This is one of those boring grown-up steps that future-you will appreciate when the paint stays put instead of peeling off like a sunburn.
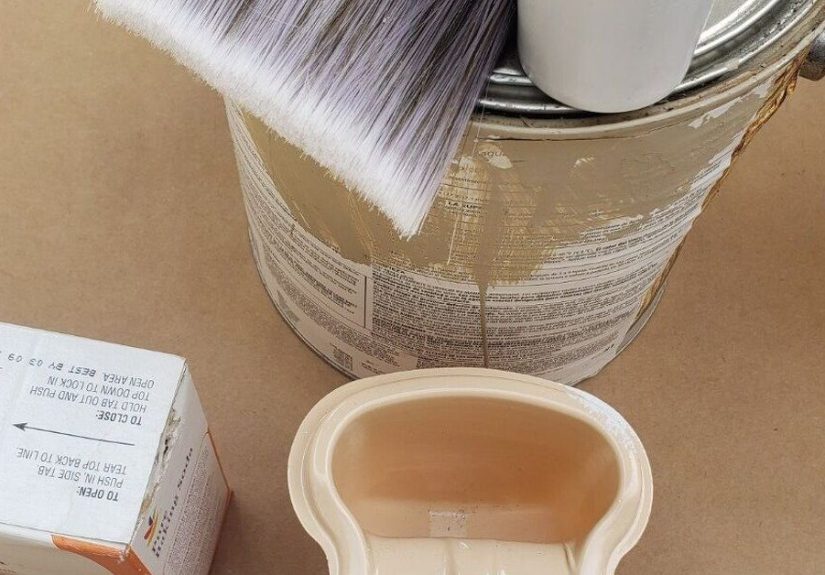
Step 3: I Mixed Paint to Create a Faux Pottery Texture
Now for the fun part: the texture. This is where a basic vase starts becoming a pottery look vase. I mixed water-based paint with baking soda until the paint thickened into something that looked creamy but slightly gritty. Not cement. Not soup. Somewhere in the very scientific middle of “yogurt that has strong opinions.”
The baking soda is what helps turn a flat coat of paint into a chalky, stone-like finish. It softens shine and adds body, which is exactly what you want for a textured vase DIY. If the mix is too thin, the vase still looks painted. If it’s too thick, you’ll fight clumps and drag marks. I found that starting small and adjusting gradually worked best.
Color choice matters too. Pottery-inspired shades tend to look most convincing in off-white, sand, mushroom, clay, taupe, greige, charcoal, soft black, dusty olive, and sunbaked terracotta. I used a warm beige on one vase, a chalky white on another, and a muted brownish clay tone on the third. Together, they looked collected and earthy instead of matchy-matchy.
Step 4: I Applied the First Coat and Ignored My Inner Critic
The first coat was not beautiful. Let’s normalize that. The first coat of almost every DIY project looks like the project has made a huge mistake.
I brushed the paint on in steady, even strokes, covering the exterior only. I kept the layers fairly thin at first because thick paint can slump, streak, or dry in weird ridges. Once the first coat dried, the texture became more visible and the color looked more intentional. That’s when the project started to make sense.
On some vases, I brushed in one direction for a smoother pottery finish. On others, I dabbed and stippled the paint slightly to mimic handmade clay. If I wanted a more aged or limewashed look, I let some subtle variation show through instead of chasing perfect coverage. Ironically, a little imperfection is exactly what makes this project look expensive.
Step 5: I Layered the Finish Instead of Overworking It
Once the first coat was fully dry, I added a second. That second coat is where the transformation really happened. The surface looked fuller, more matte, and more ceramic-like. If a section felt too smooth, I tapped on a little extra texture. If another area looked too heavy, I feathered it out with a damp brush.
This is also where restraint matters. Real pottery isn’t always heavily textured. Sometimes the best faux finish is just enough grit to break the shine and enough variation to suggest craftsmanship. I kept telling myself, “You’re making chic pottery, not frosting a cake.” That helped.
For a slightly aged finish, you can dry-brush a lighter or darker tone over the base once it cures. A soft white over clay creates a sun-faded look. A dusty brown over beige gives the piece a more weathered, vintage effect. The key is subtlety. This should whisper “old-world charm,” not scream “I was attacked by a sponge.”
Step 6: I Let Everything Dry Properly
Here is the step most people want to skip and absolutely should not: drying and curing. A vase may feel dry to the touch long before the finish is actually durable. I let my pieces sit undisturbed for at least a full day before handling them much. If you’re using glass-specific or multi-surface paint, check the label because some products need longer cure times for the best durability.
For decorative use, patience pays off. Touching too soon leaves fingerprints, dents, or smudges that look less “artisan” and more “I got excited and ruined it.” Been there.
How I Made the Finish Look More Like Real Pottery
I Chose Matte Over Gloss
The quickest way to ruin the pottery illusion is leaving too much shine. Pottery-inspired decor tends to look soft, chalky, earthy, and tactile. If a vase still catches light like a disco ball, it reads as painted glass, not ceramic. A matte finish is what makes the trick convincing.
I Focused on Earthy Colors
Pottery tones usually feel pulled from nature: clay, limestone, sand, ash, bone, charcoal, and warm white. Even when I wanted a modern look, I stayed in muted colors because they let the texture do the talking.
I Styled Them Like Decorative Objects, Not Just Flower Holders
One of the best things I learned is that pottery-style vases don’t always need flowers. They can stand alone on a shelf, sit in a group on a console, or hold dried stems, branches, bunny tails, eucalyptus, or olive sprigs. Once I started styling them as sculptural decor, the makeover looked even more believable.
Common Mistakes I’d Avoid Next Time
- Skipping prep: If the glass isn’t clean, the paint may slide, streak, or peel.
- Using the wrong paint: Regular craft paint can work, but glass-friendly or multi-surface formulas usually hold up better.
- Mixing too much baking soda: Too much texture can look crusty instead of refined.
- Making every vase identical: A little variation in height, color, and finish makes the collection feel more natural.
- Styling them with overly bright fake flowers: Your gorgeous faux pottery vase deserves better than neon plastic tulips with emotional baggage.
How I Styled the Finished Vases at Home
Once the paint cured, I grouped the vases together on a wood console with a stack of books and a small bowl. Instantly, the area looked warmer and more intentional. One vase got dried stems. One stayed empty. One held a few clipped branches from the yard because apparently I’m now the sort of person who says things like “foraged accents.”
The best part about this project is how adaptable it is. These vases work in a modern farmhouse space, a minimalist room, a coastal nook, or a wabi-sabi corner with linen and wood. They add shape, softness, and texture without demanding too much attention. They’re the decor version of a very stylish friend who doesn’t need to be the loudest person in the room.
Was It Worth It?
Absolutely. This upcycled home decor project cost a fraction of buying real decorative pottery, and it gave me more control over color, texture, and scale. I could customize each piece to fit my home instead of trying to force a store-bought vase to match my style.
More importantly, the finished vases looked layered and lived-in. They didn’t feel mass-produced. They felt curated. And that, in home decor terms, is basically the dream.
My Real Experience Making Glass Vases Look Like Pottery
The funniest part of this project is that I started it with very low expectations. I thought I’d make one vase, have a pleasant little DIY afternoon, and maybe end up with something acceptable for a corner shelf. Instead, I became weirdly obsessed. Once I finished the first one, I started scanning every plain glass container in my house like it was a potential pottery candidate. An old vase? Yes. A forgotten bottle? Also yes. Something that may once have held fancy pasta sauce? Welcome to your second life.
What surprised me most was how much the texture changed the mood of the object. Before painting, the glass felt cold and a little generic. Afterward, even the cheapest vase had presence. It looked softer, heavier, more intentional. That transformation made me understand why pottery-style decor is so popular in the first place. It brings in warmth without clutter. It feels grounded. It doesn’t shout. It just quietly makes everything around it look better.
I also learned that not every vase wants the same finish. The tall bottle-shaped one looked best with a smoother coat and subtle brush movement. The rounder piece looked amazing with more texture because it emphasized the shape and caught light in a softer way. The cylinder vase ended up somewhere in the middle. That taught me to stop using one formula for every project and pay attention to what the object itself is already offering.
Another lesson: this is one of those DIYs where “imperfect” often looks more expensive than “perfect.” I kept trying to smooth everything out at first, but the moment I relaxed and let some variation stay, the vases looked more believable. Not messyjust organic. That tiny shift in mindset made a huge difference. Home decor can get too polished, and these faux pottery vases felt like an antidote to that.
I’d also say this project changed how I think about decorating on a budget. A lot of expensive decor is really about finish, styling, and confidence. The base material matters, sure, but the overall effect often comes from texture, shape, and presentation. Once I realized I could create that look myself with a few inexpensive supplies, shopping got less intimidating. I stopped thinking, “I need that exact vase,” and started thinking, “I can make that feeling.” That’s a much more powerful place to decorate from.
If I were doing it again, I’d still keep the process simple. Clean well, choose a good paint, add texture carefully, go matte, and let the vase dry longer than you think you need to. Then style it with restraint. A few branches. A stack of books. A wood tray. Done. No overcomplicating. No crafting marathon. Just an easy makeover that turns ordinary glass into something that looks thoughtful, tactile, and genuinely beautiful.
Final Thoughts
If you want a simple DIY that makes a big visual difference, this is it. Turning glass vases into faux pottery is affordable, beginner-friendly, and surprisingly elegant when done with the right prep and finish. You don’t need advanced skills. You just need to clean the vase properly, use paint that can grip the surface, create a little texture, and embrace a matte, earthy look.
So yes, I made glass vases look like pottery. No kiln. No ceramic wheel. No dramatic montage set to indie music. Just a few basic supplies, a solid technique, and a refusal to pay luxury-vase prices. Honestly, that may be my favorite design style of all.


