Table of Contents >> Show >> Hide
- What Is a Tornado in a Bottle?
- Materials You Need
- Safety First: Keep the Science Fun, Not Slippery
- How to Make a Tornado in a Bottle: 12 Steps
- Step 1: Choose Two Clear Plastic Bottles
- Step 2: Rinse the Bottles Well
- Step 3: Fill One Bottle About Two-Thirds Full
- Step 4: Add Food Coloring
- Step 5: Add a Tiny Amount of Dish Soap
- Step 6: Add Glitter or Small Paper Bits
- Step 7: Connect the Bottles
- Step 8: Seal the Connection Tightly
- Step 9: Flip the Bottles So the Water Is on Top
- Step 10: Swirl the Bottles in a Circular Motion
- Step 11: Watch the Water Vortex Form
- Step 12: Repeat, Adjust, and Experiment
- The Science Behind the Bottle Tornado
- One-Bottle Tornado Variation
- Troubleshooting: Why Is My Tornado Not Working?
- Science Fair Ideas and Questions
- What Kids Learn From This Experiment
- Real Tornado Safety Reminder
- Common Mistakes to Avoid
- Experience Notes: What It Feels Like to Make a Tornado in a Bottle
- Conclusion
- SEO Tags
Want to build a tiny tornado without chasing storms across the Great Plains, wearing a helmet, or dramatically shouting “It’s coming right at us!”? Good news: you can make a tornado in a bottle with simple household materials, a little swirling motion, and enough curiosity to turn your kitchen table into a mini science lab.
This classic science experiment creates a spinning water vortex that looks like a funnel cloud inside a clear bottle. It is safe, affordable, quick to set up, and surprisingly mesmerizing. Whether you are a parent planning a weekend STEM activity, a teacher preparing a weather lesson, or a student looking for an easy science fair demonstration, this bottle tornado project makes fluid motion visible in a way that feels almost magical.
Of course, a real tornado is a powerful rotating column of air connected to a thunderstorm and the ground. Your bottle version is made of water, not wind, and it will not move a lawn chair into the neighbor’s yard. Still, it is an excellent model for understanding how a vortex forms, why spinning motion matters, and how gravity, pressure, and centripetal force work together.
What Is a Tornado in a Bottle?
A tornado in a bottle is a simple science activity that uses water, air, and circular motion to create a visible vortex. When you swirl the bottle, the water begins rotating around the center. As gravity pulls the water downward, the spinning motion creates a funnel-shaped opening. That funnel looks like a mini tornado, although it is technically a water vortex.
The experiment can be done in two popular ways. The first uses one clear bottle or jar with water, dish soap, and optional glitter. The second uses two plastic bottles connected mouth-to-mouth with a special tornado tube, washer, drilled cap, or strong tape. The two-bottle version is extra dramatic because the water drains from the top bottle into the bottom bottle while spinning into a neat funnel.
Materials You Need
Before you start, gather everything in one place. Tornado science is more fun when you are not sprinting around the house searching for tape while a half-filled bottle rolls off the table.
- Two clear plastic soda bottles, preferably 1-liter or 2-liter bottles
- Water
- A tornado tube connector, rubber washer, or bottle cap with a small hole
- Duct tape or electrical tape
- A few drops of dish soap
- Food coloring, optional
- Glitter, tiny paper bits, or small sequins, optional
- Towel or tray for spills
- Adult help if cutting, drilling, or making holes in caps
Safety First: Keep the Science Fun, Not Slippery
This is a safe experiment when done properly, but water has one sneaky superpower: it finds the floor. Work over a sink, tray, towel, or outdoor table. Use plastic bottles instead of glass, especially with younger children. If you need to drill a hole in a bottle cap, ask an adult to handle that part. Do not drink the water after adding soap, glitter, food coloring, or anything else. It may look like a magical weather potion, but it is not snack time.
How to Make a Tornado in a Bottle: 12 Steps
Step 1: Choose Two Clear Plastic Bottles
Pick two empty plastic bottles that are the same size and shape. Two-liter soda bottles work beautifully because they are clear, sturdy, and large enough to show the vortex clearly. Remove the labels so you can see the spinning water without a soda logo photobombing your science.
Step 2: Rinse the Bottles Well
Wash both bottles with warm water and let them drain. Sticky soda residue can create foam, cloudiness, and a mysterious smell that makes your experiment feel more like a forgotten lunchbox. Clean bottles give you a clearer view of the vortex.
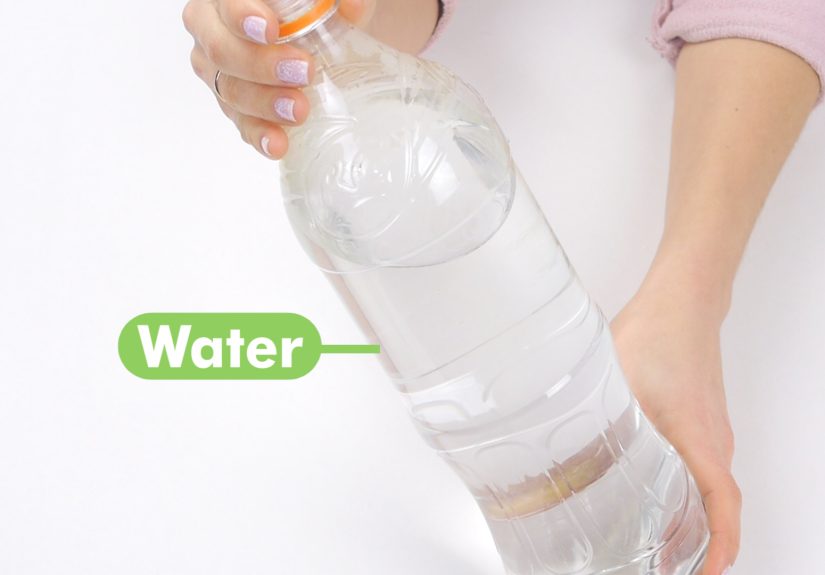
Step 3: Fill One Bottle About Two-Thirds Full
Fill one bottle about two-thirds full of water. This amount leaves enough room for air to move while giving the water enough volume to create a strong funnel. If the bottle is too full, the water may not spin well. If it has too little water, the vortex may look weak or disappear too quickly.
Step 4: Add Food Coloring
Add one or two drops of food coloring if you want a more visible tornado. Blue is popular because it gives the experiment a stormy, weather-channel mood. Do not add too much, though. If the water becomes too dark, it can hide the funnel instead of showing it off.
Step 5: Add a Tiny Amount of Dish Soap
Add a few drops of dish soap. Soap helps make the motion easier to see and can create small bubbles that trace the spinning path of the water. Use restraint here. A giant squirt of soap may turn your tornado into a foam party, which is entertaining but less scientific.
Step 6: Add Glitter or Small Paper Bits
Glitter is optional, but it makes the vortex easier to observe. Tiny particles move with the spinning water, showing the circular current inside the bottle. If glitter is not available, use tiny bits of lightweight paper. Keep the pieces small so they do not clog the opening between the bottles.
Step 7: Connect the Bottles
Attach the empty bottle upside down to the top of the water-filled bottle. The easiest method is to use a tornado tube connector, which screws onto both bottle mouths. If you do not have one, an adult can help make a connector using a washer and strong tape or a cap with a small hole. The goal is to create a narrow opening where water can pass from one bottle to the other.
Step 8: Seal the Connection Tightly
Wrap duct tape or electrical tape around the connection several times. Press the tape firmly so there are no leaks. A good seal matters because the bottles will be flipped, spun, and admired by people standing way too close to the table. Test over a sink before moving to your final experiment area.
Step 9: Flip the Bottles So the Water Is on Top
Hold the connected bottles with both hands and flip them so the water-filled bottle is on top. Water will begin trying to drain into the lower bottle. At first, it may glug slowly because air has to move upward while water moves downward through the same small opening.
Step 10: Swirl the Bottles in a Circular Motion
Move the bottles in a quick circular motion for a few seconds. You are not shaking them randomly like a maraca at a birthday party. Instead, rotate them smoothly to start the water spinning. Once the water has enough circular motion, stop swirling and watch the funnel form.
Step 11: Watch the Water Vortex Form
As the water spins and drains, a funnel-shaped vortex should appear in the upper bottle. The center of the funnel allows air to move upward while water spirals downward around it. This is why the water drains faster once the vortex forms. The air and water finally stop arguing over the same doorway.
Step 12: Repeat, Adjust, and Experiment
Flip the bottles again and repeat the process. Try changing one variable at a time. Use more water, less water, more glitter, no soap, a larger opening, or a smaller opening. Notice how each change affects the speed, shape, and duration of the tornado. Congratulations: you have officially entered the “I wonder what happens if…” phase of science.
The Science Behind the Bottle Tornado
The tornado in a bottle works because of a vortex. A vortex is a spinning flow of fluid. In this experiment, the fluid is water. In a real tornado, the fluid is air. Both air and water can move, flow, swirl, and form rotating patterns, which is why a water model can help explain some basic ideas about tornado motion.
When you swirl the bottle, you give the water angular momentum. The water keeps rotating as gravity pulls it downward. Because the water is spinning, it moves around the outside of the bottle while a hollow center forms in the middle. Air travels upward through that center as water travels downward around it. This organized movement creates the funnel shape.
Centripetal force also plays a role. As the water spins, it moves in a circular path around the center. The spinning motion helps pull the water inward toward the axis of rotation while gravity pulls it down. The result is a spiraling funnel that looks like a tiny storm trapped in plastic.
Real tornadoes are much more complex. They usually form within powerful thunderstorms where changing wind speed and direction can create rotating air. Some of the most destructive tornadoes are associated with supercell thunderstorms, which have rotating updrafts. Your bottle tornado does not include warm moist air, wind shear, radar signatures, or thunderstorm dynamics, but it does give you a simple visual model of rotation and funnel formation.
One-Bottle Tornado Variation
If you do not have two bottles, you can still make a tornado using one bottle or jar with a tight lid. Fill it about three-quarters full with water. Add a few drops of dish soap and a pinch of glitter. Seal the lid tightly. Turn the container upside down and move it in a circular motion for several seconds. Set it down and watch the vortex spin inside.
The one-bottle version is easier for younger kids and quicker to clean up. The two-bottle version is better for observing drainage, air movement, and how a vortex helps water flow more smoothly from one container to another.
Troubleshooting: Why Is My Tornado Not Working?
The Bottle Is Too Full
If there is almost no air space, the vortex may struggle to form. Pour out a little water and try again. A bottle filled about two-thirds to three-quarters full usually works well.
The Opening Is Too Wide or Too Narrow
A very large opening may drain too quickly before the water forms a clean funnel. A tiny opening may block the flow. Try a connector or washer with a moderate hole size.
You Are Shaking Instead of Swirling
Random shaking creates bubbles and chaos. Smooth circular motion creates rotation. Think “stirring the air” rather than “angry snow globe.”
Too Much Soap Was Added
Soap helps, but too much soap creates foam that can hide the vortex. Start with just a few drops. You can always add more later, but removing soap is harder unless you start over.
The Bottles Are Leaking
If water is escaping from the connection, dry the bottle necks and add more tape. A leaky tornado maker is still science, but it is also a mop invitation.
Science Fair Ideas and Questions
This experiment is perfect for a science fair because you can turn it into a testable investigation. Instead of simply showing a cool effect, ask a question and collect data.
- Does the amount of water affect how long the vortex lasts?
- Does bottle size change the speed of drainage?
- Does glitter make the vortex easier to observe?
- Does warm water create a different-looking vortex than cold water?
- Does the size of the connector hole affect the tornado shape?
- Does adding dish soap change the visibility or duration of the funnel?
For a stronger project, change only one variable at a time. For example, if you test different water levels, keep the same bottle size, connector, swirling motion, and amount of soap. Time each vortex with a stopwatch and record your results in a simple table. Science loves curiosity, but it also appreciates neat handwriting.
What Kids Learn From This Experiment
A tornado in a bottle teaches more than “water spins when you spin it.” It introduces important STEM concepts in a hands-on way. Students observe gravity, fluid motion, air pressure, rotation, and vortex formation. They also practice prediction, observation, measurement, and comparison.
The activity is especially useful because the results are visible. Many science concepts feel invisible or abstract. You cannot easily see pressure differences or angular momentum in everyday life, but when glitter spins down a water funnel, the idea becomes easier to understand. The bottle becomes a tiny window into fluid dynamics.
Real Tornado Safety Reminder
A bottle tornado is fun. A real tornado is not. If your area is under a tornado watch, conditions are favorable for tornadoes, so stay alert. If a tornado warning is issued, a tornado has been spotted or indicated by radar, and you should take shelter immediately. The safest place is usually a basement or an interior room on the lowest level of a sturdy building, away from windows.
This science experiment is a great time to discuss weather safety with kids. The same curiosity that makes them ask, “How does the vortex form?” can also help them understand why alerts matter and why families should have a severe weather plan.
Common Mistakes to Avoid
First, do not use glass containers for energetic swirling, especially with children. Plastic is lighter, safer, and easier to handle. Second, do not add heavy objects to the bottle. Glitter and tiny paper bits are fine; pebbles and beads are not necessary and may block the connector. Third, do not assume more soap equals a better tornado. In this case, more soap often equals more bubbles, and more bubbles equal “Where did my vortex go?”
Finally, do not skip the observation part. The best learning happens when you slow down and ask what changed. Did the vortex last longer this time? Was the funnel wider? Did the water drain faster? Did the glitter move near the outside or toward the center? These small observations turn a quick activity into real scientific thinking.
Experience Notes: What It Feels Like to Make a Tornado in a Bottle
The first time you make a tornado in a bottle, there is usually a moment of doubt. You flip the bottles, water blurps downward in uneven gulps, and everyone stares at it like the experiment forgot to read the instructions. Then you swirl the bottles in a clean circular motion, set them upright, and suddenly a funnel appears. It is small, fast, and strangely satisfying. The room usually reacts with some version of “Whoa!” which is the official sound of successful kitchen science.
One of the best experiences with this activity is watching how different people approach it. Younger kids often want to shake the bottles as hard as possible. Their method produces bubbles, excitement, and sometimes a suspicious puddle. Older students usually begin experimenting right away. They ask whether more water makes a stronger tornado, whether glitter changes the flow, or whether the bottle shape matters. Adults, meanwhile, tend to pretend they are supervising while secretly wanting another turn.
A helpful trick from experience is to practice the swirl before the “official” demonstration. The motion should be smooth and circular, almost like moving a hula hoop through the air with your hands. If you shake up and down, the water becomes bubbly and confused. If you rotate the connected bottles steadily, the water organizes itself into a clean spiral. Once students see the difference, they understand that the motion they add to the system affects the result.
Another useful lesson is that less can be more. A tiny amount of dish soap helps show motion, but too much soap makes foam. A little glitter highlights the vortex, but too much glitter turns the bottle into a sparkling snowstorm. Food coloring makes the water more visible, but too many drops make the inside too dark. The best tornado bottle usually comes from balance: clear water, a small visual aid, a good seal, and a confident swirl.
This activity also works well as a conversation starter. After the fun part, ask students what they noticed. Some will mention the funnel. Others will notice that the water drained faster after spinning. Some may spot the air moving upward through the center. Those observations lead naturally into discussions about water flow, air pressure, and real weather systems. You do not need to turn the room into a graduate physics seminar. A few thoughtful questions can make the experiment feel deeper without draining the fun out of it.
For families, the tornado in a bottle is a great rainy-day activity because it uses common items and does not require a long setup. For teachers, it is a reliable classroom demonstration because students can see the result from a distance, especially with a large two-liter bottle. For science fairs, it gives students a project they can repeat, measure, and explain clearly. It is simple enough for beginners but flexible enough for real investigation.
The biggest takeaway from making a tornado in a bottle is that science does not always need expensive equipment or dramatic explosions to be exciting. Sometimes all it takes is water, air, motion, and a plastic bottle that was probably headed for the recycling bin. With one swirl, an ordinary bottle becomes a model of rotation, gravity, and flow. Not bad for something that used to hold soda.
Conclusion
Learning how to make a tornado in a bottle is one of the easiest ways to bring weather science to life. With two plastic bottles, water, tape, and a little circular motion, you can create a spinning vortex that demonstrates important ideas about fluid movement, air pressure, gravity, and rotation. The project is simple enough for kids, useful enough for classrooms, and interesting enough that adults may suddenly become very invested in “just one more test.”
The best part is that the experiment invites questions. Why does the water drain faster when it spins? Why does the funnel form in the middle? What happens if you change the water level, bottle size, connector, or swirling speed? Those questions are the heart of science. The tornado may be tiny, but the curiosity it creates can be enormous.


