Table of Contents >> Show >> Hide
- Why the One-Day Method Actually Works
- Before You Start: Pick the Right Furniture Candidate
- What You Need for a One-Day Furniture Refinish
- The Popular Mechanics One-Day Workflow
- Paint or Stain: Which Is Better for a One-Day Project?
- Common Mistakes That Turn “One Day” Into “Why Is It Sunday Night?”
- A Sample One-Day Refinishing Timeline
- Experiences From Real One-Day Furniture Refinishing Projects
- Conclusion
- SEO Tags
Furniture refinishing has a reputation problem. Mention it at a weekend barbecue and somebody will act like you just volunteered to restore the Constitution with a toothbrush. But Popular Mechanics makes a convincing case that at least some furniture can be revived in a single day, without turning your garage into a chemistry lab or your patience into sawdust.
The key phrase is “some furniture.” We are not talking about museum-worthy antiques, delicate heirlooms, or a mysteriously sticky armoire that may have survived two wars and one flood. We are talking about straightforward wood furniture with a tired finish, a few scars from real life, and enough dignity left to deserve a second act. Think side tables, chests, nightstands, benches, or simple dressers that look rough but are still structurally sound.
What Popular Mechanics gets right is refreshingly practical: match the method to the piece. A beat-up chest from the attic does not need a three-week spiritual retreat. It needs a smart, efficient plan. And when you combine that plan with advice echoed by home-improvement and wood-finishing pros, you get a fast, realistic, and surprisingly satisfying one-day refinishing strategy.
Why the One-Day Method Actually Works
The biggest mistake beginners make is assuming every refinishing project must be stripped to bare wood with theatrical levels of suffering. Not true. A one-day furniture refinish works because you are focusing on a manageable goal: make the piece clean, attractive, protected, and useful again. That is very different from conservation-grade restoration.
Popular Mechanics frames the process around a simple wood chest and deliberately keeps perfection off a pedestal. That mindset matters. When your target is “presentable and durable” instead of “ready for a close-up in a period drama,” the project becomes faster, cheaper, and much less intimidating.
There is also a practical reason this approach saves time: modern fast-dry stains and spray polyurethane finishes move quickly. If the surface prep is solid, you can sand, stain, seal, and reassemble in a single day. In other words, the secret is not magic. It is prep, product choice, and resisting the urge to overcomplicate everything.
Before You Start: Pick the Right Furniture Candidate
Solid wood is your best friend
If you want a one-day win, choose furniture that is simple and sturdy. Solid wood pieces are usually the safest bet because they tolerate sanding and new finish better than flimsy laminate or badly damaged veneer. If the piece has veneer, slow down and sand lightly. Veneer is thin, and once you sand through it, your “weekend project” becomes a “why is this table bald?” situation.
Skip valuable antiques
If the furniture is very old, rare, or potentially valuable, refinishing it yourself may lower its value. The one-day method is best for ordinary pieces with cosmetic wear, not historical treasures. A practical chest from the attic? Great. Great-grandma’s hand-carved walnut cabinet? Maybe let that one keep its mystery.
Watch for structural issues
Refinishing is about the surface. If the frame is loose, legs wobble, drawers rack, or joints are failing, handle those repairs first. Cosmetic refinishing will not make a broken chair less broken. It will only make it prettier while it betrays you.
Be careful with older painted furniture
If the piece has old paint and comes from a pre-1978 home or building, do not casually sand first and ask questions later. Lead-based paint is a real safety issue. If lead is possible, use lead-safe practices or bring in a qualified pro. Speed is nice; poisoning is not.
What You Need for a One-Day Furniture Refinish
You do not need a workshop that looks like it belongs in a tool catalog. You need a sensible kit:
A drop cloth, screwdriver, random orbital sander or sanding block, sandpaper in progressive grits, tack cloth or lint-free rags, a shop vacuum or dust collection setup if possible, gloves, eye protection, and a dust mask or respirator. If you want color, have a fast-dry stain ready. For protection, a quick-drying polyurethane spray is ideal for this type of project. If the hardware is oxidized or outdated, have abrasive pads and spray paint on hand for a quick refresh.
Set up in a well-ventilated workspace with room to move around the piece. Refinishing gets messy fast, and nothing slows a project like trying to spray a finish beside a bicycle, a rake, three extension cords, and your cousin’s abandoned treadmill.
The Popular Mechanics One-Day Workflow
Step 1: Remove and refresh the hardware
Start by taking off knobs, pulls, hinges, and decorative hardware. Put all screws and small parts in a bag so they do not vanish into the ancient dimension where missing hardware lives. If the metal looks dull or rusty, scrub it with an abrasive pad to remove oxidation and give paint something to grip. If you want a new look, spray-paint the hardware first so it can dry while you work on the wood.
This is a smart time-saving move. Hardware paint often takes longer to cure than you want, so getting it started first keeps the project moving. It also instantly modernizes a piece. Sometimes the drawer pulls are not “vintage.” Sometimes they are just tired and weird.
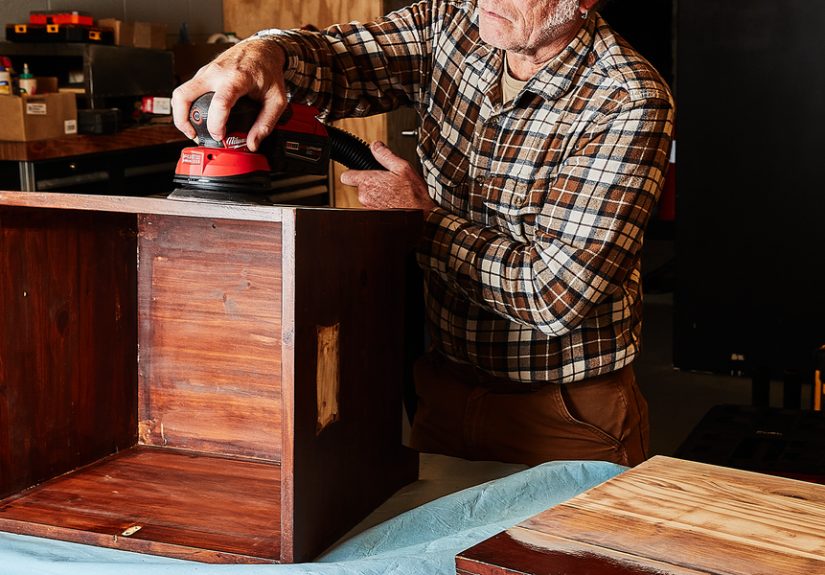
Step 2: Sand in stages, not in a panic
Popular Mechanics recommends starting with 100-grit sandpaper, then moving through 220-grit, and finishing with 320-grit. That progression makes sense for a quick refinish on a simple wood piece. The coarser grit removes the tired finish, the medium grit smooths the surface, and the finer grit refines it for stain or clear coat.
Work methodically, one surface at a time, using even pressure. Sand with the grain whenever possible. On corners and edges, lighten up. This is especially important on veneered furniture, where aggressive sanding can cut through the top layer before you even realize it.
A shop vac connected to the sander helps tremendously with dust control. If you do not have one, wear a dust mask and vacuum thoroughly afterward. Hand-sand the corners and details so you do not round over sharp lines or miss awkward spots. The goal is not to obliterate the furniture’s identity. The goal is to remove the tired finish and leave a clean, even surface.
Step 3: Remove every trace of dust
This step is boring. It is also where great finishes are born. After sanding, wipe the piece with a tack cloth or clean lint-free rag until the surface is truly dust-free. Then do it again if you are the suspicious type, which in furniture refinishing is simply called “correct.”
Dust is the gremlin of wood finishing. Leave it behind and your stain will look dirty, your clear coat will feel gritty, and your confidence will be tested in ways no end table deserves.
Step 4: Stain only if you need color
If you like the natural wood tone, you can skip the stain and go straight to the protective finish. But if the wood looks uneven, pale, or just not the vibe, apply a fast-drying stain. Popular Mechanics recommends testing color on an inconspicuous area first, which is excellent advice. The underside or back edge is a safer place for surprises than the top surface everyone sees.
Apply stain with a lint-free rag, working it in until the color looks even. If you are working with a soft wood that tends to blotch, like pine or fir, a pre-stain conditioner can help create more even absorption. This extra prep may feel annoying, but it beats discovering your “warm walnut” finish looks like a giraffe.
Step 5: Seal it with a fast-drying topcoat
Once the stain is ready, wipe the surface again to remove any lingering dust, then apply a quick-drying polyurethane spray. Popular Mechanics favors a methodical sweeping pattern, keeping the can at a consistent distance from the surface. That matters. Too close and the finish can puddle. Too far and it may dry midair and leave a rough texture.
Expect the first coat to look a little uneven. That is normal. Thin, multiple coats are far better than one heroic flood. A satin or semi-gloss sheen is often the sweet spot for real-world furniture because it looks polished while hiding minor imperfections better than a high-gloss finish.
Four or five light coats may sound excessive, but with a fast-dry formula, it is realistic. The reward is a more durable finish with better depth and a smoother overall look.
Step 6: Reassemble and admire your suspiciously good decision-making
After several hours of drying, carefully reinstall the hardware. If you painted the screw heads and nicked them during reassembly, touch them up with a small swab. Then step back and enjoy the moment every DIYer loves: the exact second a formerly sad object stops looking like curb bait and starts looking intentional.
Paint or Stain: Which Is Better for a One-Day Project?
Staining highlights the wood grain and gives the piece a natural, classic look. It is ideal when the wood is attractive enough to show off. Painting is the better option when the wood species is not remarkable, the surface has patchy discoloration, or the style you want is more decorative than wood-centric.
For a one-day project, stain often feels a bit more forgiving on simple pieces because it celebrates the wood rather than demanding absolute surface perfection. Paint, on the other hand, can be amazing when the prep is meticulous. If you go the painted route, clean thoroughly, sand to dull the old sheen, use a good primer when needed, and apply thin coats. Thick paint is how brush marks stage a hostile takeover.
Common Mistakes That Turn “One Day” Into “Why Is It Sunday Night?”
The first mistake is choosing the wrong piece. Furniture with ornate carvings, severe damage, failing joints, or fragile veneer is not a fast project. The second is rushing prep. Clean-sand-clean is not glamorous, but it is what makes the finish look smooth instead of tragic.
Another common error is using the wrong grit strategy. Starting too fine wastes time because it will not cut the finish efficiently. Starting too aggressive and staying there leaves deep scratches. Progressive sanding is not busywork; it is how you get an even surface without tearing the wood up.
Overapplying stain or finish is another classic mistake. More is not more. More is drips, tackiness, and an evening spent whispering apologies to a coffee table. Thin coats, even passes, and patience between coats are what make the piece look professional.
And finally, do not ignore safety. Use ventilation. Wear the right protection. Read the product instructions. Fast does not mean reckless.
A Sample One-Day Refinishing Timeline
Here is what a realistic schedule can look like for a simple side table or chest:
8:00 a.m. Remove hardware, clean the piece, prep the workspace.
8:45 a.m. Scrub and spray-paint hardware if needed.
9:15 a.m. Sand with 100-grit, then 220-grit, then 320-grit.
11:30 a.m. Vacuum and wipe down thoroughly with tack cloth.
12:00 p.m. Test stain, then apply stain if desired.
1:00 p.m. Light lunch, admire your progress, pretend you always had this under control.
1:30 p.m. Apply first coat of polyurethane spray.
2:00–3:30 p.m. Apply additional light coats at recommended intervals.
5:30 p.m. Let the finish settle and dry enough for careful handling.
7:00 p.m. Reassemble hardware and move the piece carefully into place.
That timeline assumes a manageable project, a straightforward shape, and fast-dry products. It is not a guarantee for every piece. It is a realistic target when the furniture and materials cooperate.
Experiences From Real One-Day Furniture Refinishing Projects
The most surprising part of a one-day refinish is not how hard it is. It is how quickly the emotional arc changes. At 8:00 in the morning, the piece looks like a chore. By lunch, it looks like potential. By evening, it looks like you suddenly became the kind of adult who says things like, “This old chest just needed a better finish.” That transformation is wildly satisfying.
Many DIYers discover that the hardest part is not sanding or staining. It is deciding when to stop “improving” the piece. You begin with noble intentions: just a quick refinish. Then you notice the hardware. Then the drawer runners. Then maybe the room could use a new lamp. Suddenly the furniture project is trying to recruit the entire house into a renovation cult.
Another common experience is realizing that furniture tells on you. If you skipped cleaning, the stain will tell. If you rushed the dust removal, the topcoat will tell. If you got impatient and sprayed too heavily, the drips will absolutely tell. Furniture refinishing is honest that way. It rewards calm, repeatable effort more than brute force or improvisational chaos.
People also learn very quickly that sheen changes everything. A high-gloss finish can look beautiful, but on everyday furniture it also behaves like a gossip columnist, reporting every flaw to the public. Satin and soft semi-gloss finishes are often friendlier. They still look finished and intentional, but they do not spotlight every tiny imperfection from six different angles.
One of the most useful real-world lessons is that hardware matters more than expected. Cleaned or newly painted pulls can completely shift the style of a piece. A plain chest can move from “college storage survivor” to “rustic-modern accent piece” with fresh hardware and a clean finish. It is one of the cheapest upgrades in the project, yet often one of the most visible.
There is also the psychological win of finishing in one day. Long projects tend to migrate. They occupy workbenches, corners of garages, and the back seats of your brain. A same-day refinish avoids that half-finished limbo. You start in the morning with a tired object, and by night you have a useful piece back in the room. That momentum builds confidence for future DIY work.
Of course, one-day projects still come with little surprises. Maybe the stain looks darker than expected. Maybe one drawer pull is bent. Maybe the underside reveals a different wood tone than the top. Those moments are normal. Experienced refinishers do not panic; they adjust. They test first, touch up carefully, and remember that furniture used in real homes does not need to look factory perfect to look excellent.
Perhaps the best experience of all is the shift in how you see old furniture afterward. Once you have refinished one modest piece successfully, you stop seeing scratched tables and dull chests as junk. You start seeing shapes, wood grain, hardware possibilities, and second chances. It is a handy skill, but it is also a new way of looking at things. And honestly, that may be the most addictive part.
Conclusion
According to Popular Mechanics, refinishing furniture in one day is not only possible, it is practicalprovided you choose the right piece, use the right materials, and keep your ambitions firmly in the “smart refresh” lane. Remove the hardware, sand in stages, clean off every speck of dust, use a fast-dry stain if needed, and build protection with multiple light coats of polyurethane. That is the formula.
The result is not just prettier furniture. It is a better relationship with the stuff you already own. Instead of tossing a worn piece to the curb, you can revive it, customize it, and keep it useful for years. Not bad for a single day’s work and a little controlled sawdust.


