Table of Contents >> Show >> Hide
- Why Your Steamer Is Spitting in the First Place
- How to Stop Your Steamer from Spitting in Just a Few Simple Steps
- Mistakes That Make a Spitting Steamer Worse
- How to Steam Clothes Without Leaving Water Spots
- When Your Steamer Needs Repair, Not Another Pep Talk
- Real-World Experiences: What This Problem Looks Like in Everyday Life
- Conclusion
If your garment steamer has started acting like a tiny, angry whalesnorting, sputtering, and launching surprise water spots onto your shirtyou are not alone. A spitting steamer is one of those household annoyances that feels deeply personal. You wanted smooth, polished clothes. Your steamer wanted chaos. The good news is that this problem is usually fixable, and often with a few very simple adjustments.
Most of the time, a steamer spits because something is interfering with the way water turns into steam. Maybe the unit was not fully heated. Maybe mineral buildup is clogging the nozzle. Maybe the tank is overfilled, the hose is trapping condensation, or the machine is being tilted like it is auditioning for a dramatic movie scene. In some cases, users accidentally make things worse by adding scented water, cleaners, or deodorizers to the tank. That might sound clever in theory, but in real life it is how many steamers start behaving badly.
Below, you will learn what causes steamer sputtering, how to fix it fast, how to prevent those annoying wet spots on your clothes, and when to stop troubleshooting and admit your steamer needs professional help. In other words, this is the article your wrinkled blazer has been begging you to read.
Why Your Steamer Is Spitting in the First Place
A garment steamer should release a steady flow of hot vapor. When it spits, that usually means liquid water is getting pushed out before it has fully converted to steam. That can happen for several reasons, and a few of them tend to show up again and again.
1. The Steamer Hasn’t Heated Up All the Way
This is the most common user error, and it is also the easiest to fix. If you start steaming before the heating element is fully ready, the water inside the unit may not be hot enough to become a clean, steady stream of steam. Instead, you get warm droplets, random sputters, and a shirt that now looks like it stood too close to a nervous rain cloud.
Some handheld steamers heat quickly, while others need longer than people expect. If you are rushing through your routine and attacking wrinkles the second the power light comes on, you may be jumping the gun. Give the unit the full warm-up time recommended by the manufacturer, and if your model needs priming, do that too.
2. Mineral Buildup Is Clogging the Steamer
Hard water is not exactly a steamer’s best friend. Minerals left behind by tap water can build up inside the tank, nozzle, vents, or hose. Over time, that buildup interferes with airflow and steam production. Once the pathway is partially blocked, pressure gets uneven, and the unit starts sputtering water instead of delivering smooth steam.
This is why a steamer that worked beautifully for months can suddenly become moody. One day it is your laundry hero. The next day it is spraying tiny hot spots onto your blouse like it has developed trust issues. If your steam output has dropped, you see chalky residue, or the unit spits more than it steams, mineral deposits are a likely culprit.
3. The Water Tank Is Overfilled or Not Seated Properly
Fill lines exist for a reason. When you go past the maximum line, excess water can move into places it should not be, which makes sputtering more likely. The same thing can happen if the removable tank is not installed correctly or if the locking valve is not fully closed. In short, if the tank is a little crooked, your whole morning can get a little chaotic.
Low water can also create problems on some models. If the pump is unprimed or struggling because the water level is too low, the steamer may not produce a consistent flow. That inconsistency can show up as weak steam, spurts of hot water, or no steam at all followed by a surprise spit the second you think it is “finally working.”
4. The Unit Is Being Held at the Wrong Angle
Many garment steamers are designed to be used upright or nearly upright. Tilt them too far, hold them sideways for long periods, or lower the hose too much on a standing model, and condensation can collect and then drip or spit out through the nozzle. On hose-style steamers, a sagging hose can trap water. On handheld models, the wrong angle can move liquid water toward the steam outlet.
In other words, technique matters. A steamer is not a magic wand, even if it occasionally sounds like one. Holding it correctly is part of getting a dry, even result.
5. Someone Added the Wrong Stuff to the Tank
This one deserves a tiny, loving lecture. Do not pour fragrance, fabric refresher, essential oil, cleaner, or random “laundry hack” liquid into your steamer unless your manufacturer explicitly says you can. Some brands warn that additives can create residue, cause brown dripping, or lead to spitting. Even if a product smells like lavender and good intentions, it may leave behind the kind of gunk your steamer absolutely hates.
If you want your clothes to smell fresh, use a fabric-safe spray after steaming and drying. Your steamer’s water tank is not the place for homemade perfume experiments.
How to Stop Your Steamer from Spitting in Just a Few Simple Steps
Now for the part you came for: the fix. Start with the easy steps first, because in many cases the problem is a simple maintenance or usage issuenot a broken appliance.
Step 1: Turn It Off, Let It Cool, and Empty the Tank
If the unit is actively spitting, stop using it. Unplug it, let it cool completely, and empty any remaining water. This resets the situation and gives you a chance to start clean instead of continuing a losing battle against steam droplets.
While it is cooling, inspect the outside of the steamer. Look for obvious leaks, cracks, or loose fittings. If the base is leaking or the cord is damaged, skip the DIY optimism and move straight to repair or replacement.
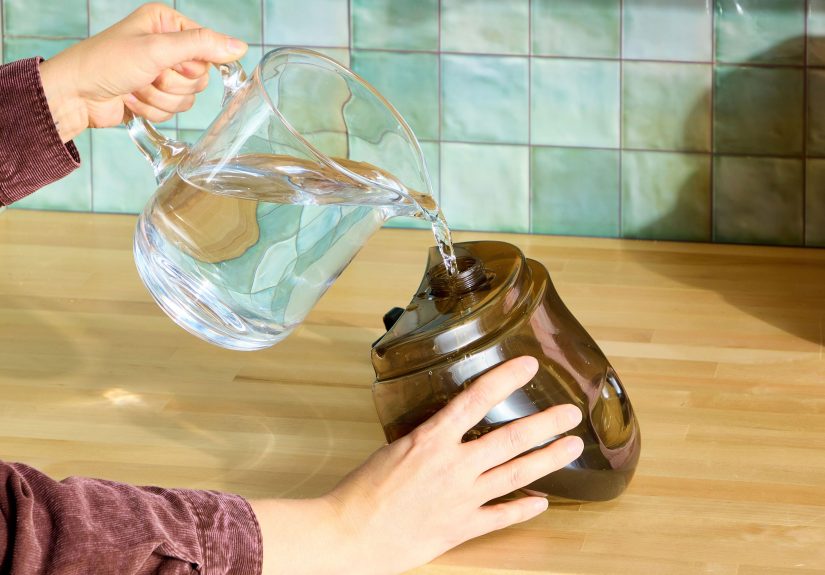
Step 2: Refill It With the Correct Waterand Only to the Fill Line
Check your manual for the exact type of water recommended for your model. Many steamers do best with distilled water, especially in hard-water areas. Some manufacturers allow tap water, while others suggest distilled water only in specific conditions. The key is not guessing. The correct answer is whatever your manual says.
Whatever water type your brand recommends, fill only to the max line. Not above it. Not “just a little extra so I do not have to refill later.” That extra splash is often where your trouble begins.
Step 3: Let the Steamer Fully Preheat
Once refilled, give the steamer enough time to heat completely. Do not test it on your nicest shirt first. Use a towel, an old cotton T-shirt, or a rag to see whether the steam is steady. If your model requires priming, hold the steam button as directed until the flow becomes consistent.
This is also the moment to be patient. Not “I waited eight dramatic seconds and assumed that was enough” patient. Real patient. Let the machine do its job so it can help you do yours.
Step 4: Hold It Upright and Straighten the Hose
If you have a standing steamer, keep the hose as upright as possible so condensation can fall back into the unit rather than collect and spit out. If the hose is drooping near the floor, lift and straighten it occasionally. If you have a handheld unit, keep it in the position recommended by the manufacturer. Many models dislike being tilted too far.
This one small adjustment makes a surprising difference. A steamer that seemed “broken” can behave almost perfectly once the hose is upright and the nozzle angle is corrected.
Step 5: Clean the Nozzle and Check for Buildup
If you see chalky residue, reduced steam, or repeated sputtering, your nozzle may be partially clogged. Once the unit is cool, inspect the openings. Some steamers can be cleaned externally with a soft cloth and gentle manual cleaning around the nozzle area. Freestanding models may also need the hose flushed if sediment has collected there.
Do not jam sharp tools into delicate parts like you are trying to perform surgery with a toothpick and blind confidence. Gentle cleaning is the goal.
Step 6: Descale the Right Way for Your Brand
This is where people get tripped up, because descaling guidance is not identical across all brands. Some manufacturers and cleaning experts recommend a vinegar-based cleaning cycle. Others warn against putting anything except water into the tank. Some brands have their own cleaner and specific timing instructions.
So here is the smart rule: follow your manufacturer’s approved method first. If your brand recommends a vinegar-and-water decalcifying cycle, use that exact ratio and rinse thoroughly afterward. If your manual says no additives, believe it and do not freelance with pantry chemistry. The goal is a clean steamer, not a science fair project.
Mistakes That Make a Spitting Steamer Worse
Sometimes the problem is not the steamer. Sometimes the problem is… us. Here are the habits that tend to make sputtering worse:
Using Stale Water
Water left sitting in the tank between uses can contribute to residue, odor, and internal buildup. Empty the reservoir after each session. Your future self will thank you, and so will your silk blouse.
Ignoring Early Warning Signs
If the steamer starts making weaker steam, leaving occasional damp spots, or showing chalky residue around the nozzle, do not wait until it turns your dress shirt into a polka-dot incident. Clean it early. Light buildup is much easier to fix than a heavily clogged unit.
Adding Chemicals or Scented Products
Yes, we are mentioning this again, because it causes a lot of preventable trouble. If the tank is not designed for additives, keep it to plain water only. Clothes should smell fresh because they are cleannot because your steamer has become a lavender swamp.
Refilling While the Unit Is Hot
Some models specifically warn users to let the steamer cool before adding more water. That protects both the machine and your hands. It also reduces the chance of odd sputtering behavior caused by temperature shock or improper handling during refill.
How to Steam Clothes Without Leaving Water Spots
Even once the spitting is solved, technique still matters if you want great results. Hang the garment properly, keep the fabric taut with your free hand, and work from the top down. For delicate fabrics, steam from the inside when possible. That gives you a better shot at avoiding visible water marks on the front of the garment.
Do not panic if you see a little dampness. Some moisture is normal. Steam comes from water, after all. The trick is knowing the difference between a normal light dampness and a full-on sputter. A few small damp spots should dry quickly. Random droplets and streaks mean your steamer still needs attention.
After steaming, let the garment dry completely before wearing or storing it. Putting slightly damp clothes back into the closet can invite mustiness, wrinkles, and disappointmentthe laundry trifecta nobody asked for.
When Your Steamer Needs Repair, Not Another Pep Talk
There comes a moment in every appliance relationship when encouragement is no longer enough. If your steamer keeps spitting after proper cleaning, correct filling, full preheating, and careful positioning, you may be dealing with a worn seal, internal blockage, faulty heating element, leaking valve, or damaged hose.
Stop using the unit and seek service if you notice any of the following:
- Water leaking from the base
- Persistent brown or dirty discharge after approved cleaning
- No heat or dramatically reduced heat
- A damaged cord or plug
- Cracks in the tank, hose, or fittings
- Hot water spraying unexpectedly even when the unit is used correctly
At that point, continuing to steam your clothes is less “resourceful home maintenance” and more “an avoidable burn risk with a dress code.”
Real-World Experiences: What This Problem Looks Like in Everyday Life
Nothing teaches you steamer maintenance faster than a bad experience five minutes before you need to leave the house. Picture this: you are dressed for a wedding, the outfit is nearly perfect, and the only thing standing between you and greatness is one wrinkle running down the front of your satin dress. You plug in the steamer, get impatient, and start too soon. The nozzle spits a cluster of water droplets right onto the fabric. Suddenly you are not attending a beautiful ceremony; you are blotting your own chest with a towel and muttering words that are not wedding appropriate.
Or maybe it happens in a hotel room before an important work meeting. You unpack your shirt, discover it looks like it lost a fight with a suitcase, and remember you wisely packed a travel steamer. Very efficient. Very adult. Then the steamer spits on the collar because you filled it in a hurry, tilted it sideways, and forgot it has not been used since your last trip three months ago. The tank still smells faintly like forgotten water and questionable ambition. That is when many people realize steamers are low-maintenance, not no-maintenance.
Families with upright steamers often run into a different version of the problem. Someone stores the unit with water still inside. Another person uses it for curtains. Someone else drags the hose low to steam the hem of pants. Over time, condensation builds in the hose, sediment collects, and nobody notices until the machine starts coughing warm droplets onto a freshly washed shirt. Then the whole household suddenly becomes very interested in “whose turn it was to empty the tank.” Funny how that works.
People who live in hard-water areas usually have the most dramatic stories. Their steamer may work beautifully for a while and then slowly decline: first weaker steam, then occasional sputters, then one day a full spit-fest right across a linen blouse. The fix, in many cases, is not replacing the appliance at all. It is switching to the right water, cleaning the unit correctly, and sticking to a basic maintenance routine. That realization is both annoying and comforting. Annoying because the answer was simple. Comforting because you do not need to buy a new gadget every time one starts acting up.
There is also the delicate-fabric lesson almost everyone learns once. Silk, rayon, and lightweight synthetics are very forgiving right up until they are not. If your steamer is even a little sputtery, those fabrics will expose it immediately. A cotton hoodie may shrug off a tiny damp spot. A silky blouse will preserve that memory forever. That is why experienced users test the steam on a towel first, then work from the inside of the garment when needed, and let the piece dry before judging the result.
The best part of all this is that once you figure your steamer out, it becomes one of the most useful tools in the house. It freshens blazers, rescues wrinkled dresses, makes button-down shirts look more expensive than they are, and saves you from dragging out the ironing board for every tiny crease. But like any good relationship, it runs better with a little respect: the right water, the right angle, a little patience, and occasional cleaning. Give it that, and your steamer usually stops spitting and starts behaving like the helpful adult appliance it was meant to be.
Conclusion
If your steamer is spitting, do not assume it is ruined. In most cases, the solution is straightforward: empty it, refill it correctly, let it heat fully, keep it upright, and clean out mineral buildup before it turns into a full-blown nozzle rebellion. The best long-term fix is prevention. Use the water your manufacturer recommends, never overfill the tank, skip the chemical add-ins, and store the unit empty and dry after each use.
That little routine takes only a few minutes, but it can save your clothes from water spots, save your appliance from buildup, and save your morning from the kind of laundry drama nobody has time for. A steamer should make life easier. With the right care, it absolutely will.


