Table of Contents >> Show >> Hide
- Start Strong: Choose a Pumpkin That Wants to Be a Jack-o’-Lantern
- Tools That Make Easy Pumpkin Carving Even Easier
- Safety First (Because Band-Aids Aren’t a Halloween Accessory)
- How to Carve a Pumpkin Like You’ve Done This Before
- 39 Easy Pumpkin Carving Ideas for the Best Jack-o’-Lanterns
- Make Your Carving Look Cleaner (Without Becoming a Professional)
- How to Keep a Carved Pumpkin from Rotting Too Fast
- FAQ: Quick Answers for Better Jack-o’-Lanterns
- Real-Life Experiences: What I’ve Learned Carving Jack-o’-Lanterns Year After Year
- SEO Tags
Pumpkin carving is one of the rare hobbies where it’s totally normal to buy a vegetable, perform minor surgery on it,
and then proudly display it on your porch like it pays rent. If you want a jack-o’-lantern that looks awesome
(instead of “I tried my best” in the saddest possible way), the secret is simple: pick the right pumpkin, prep it the
right way, and choose an easy design that punches above its weight.
This guide brings you 39 easy pumpkin carving ideas (beginner-friendly, low-stress, high–porch-appeal),
plus practical tips for carving cleaner lines, lighting your pumpkin safely, and keeping it from collapsing into a
moldy puddle before Halloween night.
Start Strong: Choose a Pumpkin That Wants to Be a Jack-o’-Lantern
Great carving starts at the pumpkin pile. Look for a pumpkin that’s firm, evenly colored, and heavy for its
size, with a sturdy stem and a flat-ish bottom so it won’t wobble while you work
(or faceplant on your porch later). Small to medium pumpkins are usually easiest to handlebig enough to carve, not
so massive that your arms feel like you’re wrestling a medicine ball.
Quick checklist
- Skin: Matte and firm (soft spots = future sad spots).
- Stem: Intact and dry-looking (think “cork,” not “fresh-cut celery”).
- Shape: A flatter “face” area makes tracing and carving easier.
- Size: Medium is the sweet spot for most simple pumpkin carving ideas.
Tools That Make Easy Pumpkin Carving Even Easier
You can carve with kitchen knives, but a basic pumpkin carving kit is usually safer and cleaner for beginners.
A few smart tools also make detail work feel less like a horror movie (for your hands).
- Pumpkin saw / keyhole saw: For cutting the opening and crisp curves.
- Scoop: An ice cream scoop, sturdy spoon, or scraper for the guts.
- Loop tool (optional but magical): For thinning the wall fast.
- Washable marker: Sketch designs that wipe off easily.
- Toothpicks / pushpin: For transferring stencil dots.
- LED light: Safer than candles and usually better-looking, too.
- Paper towels + tray/newspaper: For mess control and grip.
Safety First (Because Band-Aids Aren’t a Halloween Accessory)
Pumpkins are slippery, tools are sharp, and enthusiasm can be… aggressive. Keep it fun with a few simple habits:
- Work clean, dry, and well-lit. Dry hands and tools reduce slipping.
- Carve away from your body. Slow and steady beats “speed-run” carving.
- Let kids do the safe jobs. Drawing, scooping, poking stencil dotsyes. Cuttingadults.
- Use LED lights. Real flames add heat and fire risk, especially on windy porches.
- Stabilize the pumpkin. A damp towel under it helps prevent sliding.
How to Carve a Pumpkin Like You’ve Done This Before
Here’s the beginner-friendly process that keeps things cleaner, safer, and easierperfect for simple jack-o’-lantern designs.
1) Set up your “operating room”
Cover your surface, grab a trash bowl for seeds, and keep paper towels nearby. Good carving is 50% technique, 50% not
panicking because your hands are covered in pumpkin goo.
2) Cut the opening (hint: consider the bottom)
You can cut a lid on top, but many carvers prefer cutting the bottom (or a side/back access panel).
It’s easier to place over a light, and the “face” area stays stronger.
3) Scoop everything outthen scrape some more
Remove seeds and strings completely. Extra pulp left inside speeds up rot, and it also makes carving messier.
Save the seeds if you like roasting them (your kitchen will smell like fall-approved victory).
4) Thin the carving wall
Scrape the inside of the front “face” area so the wall is roughly about 1 inch thick
(thinner for easier cutting and brighter glow). This is the move that instantly upgrades your results.
5) Draw or transfer your design
Freehand with a washable marker, or tape on paper and poke dots to outline. For easy pumpkin carving stencils,
keep lines bold and shapes simple. Small details are where pumpkins go to break your heart.
6) Carve cleanly
Start with the smallest interior cuts first and save big cutouts for last (the pumpkin stays sturdier that way).
If a piece gets stuck, don’t force itfinish the cut from a new angle.
7) Light it safely
Drop in a battery LED tealight or puck light. You’ll get steady glow, no scorch marks, and fewer “why does my porch
smell like burnt squash?” moments.
39 Easy Pumpkin Carving Ideas for the Best Jack-o’-Lanterns
These ideas are designed to be beginner-friendly, quick to trace, and forgiving if your pumpkin
is a little lopsided (because… pumpkins). Mix and match elements to create your own signature look.
- Classic Tooth Gap Grin Two triangle eyes, a wide smile, and one missing tooth for instant charm.
- Goofy Big-Smile Face Oversized eyes + a rounded mouth; it reads “fun” from across the street.
- Surprised “O” Mouth Simple circles and arches; perfect if you’re short on time.
- Sleepy Eyelids Half-moon eyes and a tiny smile; looks fancy with minimal cutting.
- Angry Brows Same basic face, but add sharp eyebrows for a quick “spooky” upgrade.
- Wink and Smirk One round eye, one closed eye, and a crooked smile. Crowd-pleaser.
- Fanged Vampire Two big fangs and slanted eyes; dramatic without being complicated.
- Patchwork Stitches Cut simple “stitch” marks along the mouth or eyes like a pumpkin Frankenstein.
- Friendly Ghost A rounded ghost silhouette with two eyes; easy to trace and carve clean.
- Black Cat Profile Side-view cat with pointy ears; add whiskers with thin cut lines.
- Bat Trio Three simple bats in flight; repeat the same shape for speed.
- Spider + Corner Web Web lines in one corner plus a chunky spider body for instant Halloween energy.
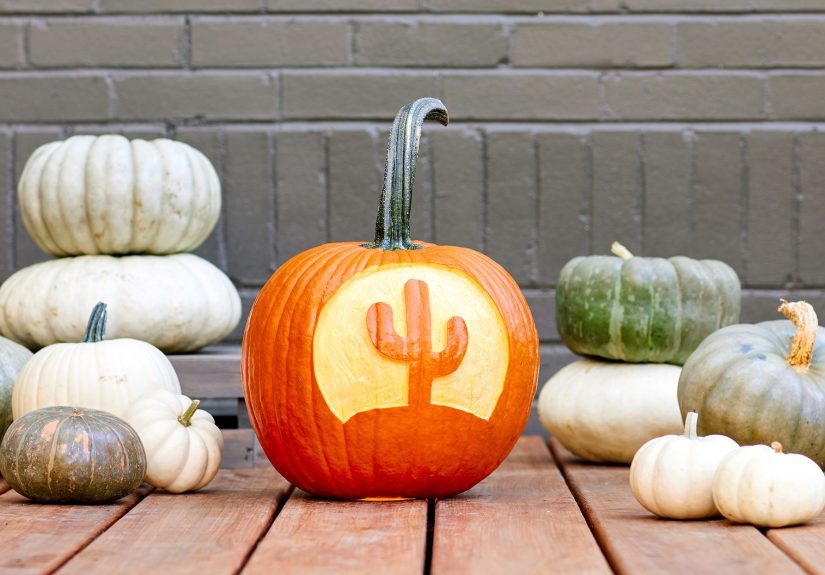
- Howling Wolf + Moon A crescent moon and a simple wolf silhouette (keep it bold and chunky).
- Witch Hat + Stars Carve a hat shape and sprinkle star cutouts around it.
- Haunted House Silhouette Blocky house shape with a few window cutouts; no tiny details needed.
- “RIP” Tombstone Big letters, one tombstone outline, and grass triangles at the bottom.
- Candy Corn Stripes Three horizontal bands; carve the top stripe fully for a bright glow effect.
- Polka-Dot Lantern Use a drill bit or corer for evenly spaced holes (super quick, super clean).
- Chevron Zigzags Repeating V-shapes around the pumpkin; looks crisp even with minor wobble.
- Big Heart Eyes Heart-shaped eyes and a smile; cute, modern, and ridiculously easy.
- Starry Night Speckles Lots of tiny stars or dots; simple pattern, huge payoff when lit.
- Sunburst Rays A circular center with rays radiating outward; forgiving and bold.
- Leafy Vine Border A simple vine wraps around the pumpkin; repeat leaf shapes to stay consistent.
- Single Initial Monogram One giant letter (A, B, M…); easiest “custom” pumpkin you’ll ever make.
- “BOO” Block Letters Big, thick letters; carve the counters (holes) carefully so they don’t fall out.
- “EEK!” Speech Bubble Outline a speech bubble and carve chunky letters inside.
- “TRICK” / “TREAT” Split Put one word on each side; minimal detail, great photo prop.
- House Number Pumpkin Carve your address number for a porch that’s festive and practical.
- Paw Print Trail Repeat a simple paw shape diagonally across the face.
- Owl Face Two big circles for eyes and a small triangle beak; add “feather” cuts if you want.
- Fish Scales Pattern Overlapping U-shapes; looks intricate but is basically just repetition.
- Simple Unicorn A horn triangle and a curved mane outline; keep it silhouette-style.
- Dinosaur Footprint One bold footprint shape; looks great on smaller pumpkins.
- Mummy Wrap Horizontal slits across the face and two big eyes peeking through.
- Skeleton Smile Vertical “teeth bars” and big eyes; graphic and easy.
- Monster Teeth Window A big open mouth “window” with a few large teeth cutouts.
- Dripping Slime Carve drips from the top edge down; add a simple face underneath.
- Two-Pumpkin Duo (Easy Upgrade) Pair a big “parent” pumpkin with a mini “baby” face next to it. Same design, double impact.
- Peekaboo Mini Pumpkin Carve a large mouth and place a tiny pumpkin inside like it’s being “chomped.”
- Lantern Window Scene Cut one large window and carve a simple silhouette inside (cat, bat, or moon).
- Minimalist Modern Face Thin eyes, small mouth, clean lines. The “Scandi porch” of jack-o’-lanterns.
Make Your Carving Look Cleaner (Without Becoming a Professional)
Use “big shapes” as your default
If you’re torn between an intricate stencil and a simpler one, choose simpler. Big shapes glow better, carve faster,
and survive porch life longer.
Thin the wall where you carve
A thinner carving surface means less force and fewer accidental cracks. It also makes light travel through the design
instead of getting swallowed by pumpkin thickness.
Fix little mistakes like a calm wizard
If you accidentally overcut a corner, toothpicks can “pin” pieces back in place. Think of them as tiny pumpkin
stitchesHalloween-appropriate and surprisingly effective.
How to Keep a Carved Pumpkin from Rotting Too Fast
Once carved, pumpkins start drying out and inviting mold. You can’t stop time (unless you’re a wizard), but you can
slow it down with moisture control, cleanliness, and temperature management.
Timing matters
If your weather is warm, carve closer to Halloweensometimes just a few days before. In cooler conditions, you may get
away with carving earlier, but “the sooner to display, the sooner to droop” is a pretty reliable rule.
Try a quick disinfecting rinse
Many home guides recommend a diluted bleach-and-water rinse or spray to discourage mold (follow label guidance and keep it
away from kids and pets). Let the pumpkin dry before lighting.
Seal exposed edges
A light coating of petroleum jelly on cut edges can help slow dehydration. Think of it as lip balm for your pumpkin.
Keep it cool
Heat speeds up decay. Use LED lights and place your pumpkin out of direct sun. If it’s wilting early, chilling it
overnight in a cool spot can help it perk back up.
FAQ: Quick Answers for Better Jack-o’-Lanterns
What’s the easiest pumpkin design for beginners?
A classic face with triangle eyes and a big smile is the easiestand still one of the best-looking when lit.
If you want “easy but impressive,” try polka dots (drilled holes) or a bold silhouette like a bat or cat.
Should I cut the top or the bottom?
Either works. Bottom (or side/back) openings can be easier for lighting and can keep the face sturdier.
Top lids look traditional and make it easier to “cap” the pumpkin for rain.
What light should I use inside a pumpkin?
Battery-operated LED tealights or small LED puck lights are the safest and help your pumpkin last longer than an open flame.
Real-Life Experiences: What I’ve Learned Carving Jack-o’-Lanterns Year After Year
The first pumpkin I ever carved looked like it had seen things. Not spooky “Halloween haunted”more like “I made eye contact
with the blender and lost.” I’d drawn a perfectly respectable face, then used a dull kitchen knife, pushed too hard, and
watched the mouth piece pop inward like a trapdoor. I learned two important truths that night: pumpkins are tougher than
they look, and overconfidence is a powerful seasoning for regret.
Over the years, the biggest improvement to my pumpkin carving results wasn’t artistic talentit was preparation.
The moment I started drying my hands and tools regularly, my cuts got cleaner and my fingers stayed attached.
The moment I started thinning the carving wall, my designs stopped looking like they were trapped behind frosted glass.
And the moment I stopped choosing “ambitious tiny details,” my pumpkins stopped snapping delicate pieces off like they were
rejecting my creative vision on principle.
I’ve also learned that carving is half technique and half mood. If you carve when you’re rushed, you’ll end up with the
pumpkin equivalent of a text message typed while walking: technically readable, but emotionally chaotic. Now I treat carving
like a mini event. I put down newspaper, queue up something Halloween-ish, and set out a bowl for seeds. That seed bowl is
weirdly importantit makes you feel organized, which is confidence you will need when you realize you drew one eye higher
than the other. (Pro tip: call it “whimsical.” People will nod.)
Family carving nights taught me the value of “division of labor.” Kids love the safe parts: picking the pumpkin, scooping
the guts, drawing the face, and poking stencil dots. Adults handle the cutting, because nobody wants a trip to urgent care
as a Halloween tradition. The funniest designs are often the simplest ones a kid drawsbig eyes, lopsided grins, random
fangs. Those pumpkins have personality. They also photograph better than overly serious “masterpieces,” because they look
like they’re having funexactly what you want on a porch.
The preservation lessons came the hard way. I once carved a pumpkin a full week early during warm weather and watched it
slowly collapse like it was sighing itself into the afterlife. Since then, I’ve become a fan of cool storage, LED lighting,
and keeping the inside clean and dry. If a pumpkin starts to look thirsty, a cooler spot overnight can help. If it starts
to look moldy, it’s time to retire it with dignity (or lean into the “decayed” aesthetic and pretend it was your plan).
The best part? Even when a pumpkin doesn’t last as long as you hoped, the carving night still countsmess, laughs, roasted
seeds, and all. Worst case, you get a funny story and a new personal rule, like: “Never trust a pumpkin that already feels
a little squishy. It’s basically telling you it has plans for the weekend, and those plans do not include being a lantern.”


